|
My last ornament ended up a little rushed. As the holidays raced in, I found I didn't have as much time to play with glass. I picked a black crested titmouse because I have several visiting my bird feeder right now. They are perky and cute.  The end result seemed a little more squat and less cheerful than the photo.  But I thought it looked fine on the tree with the others. 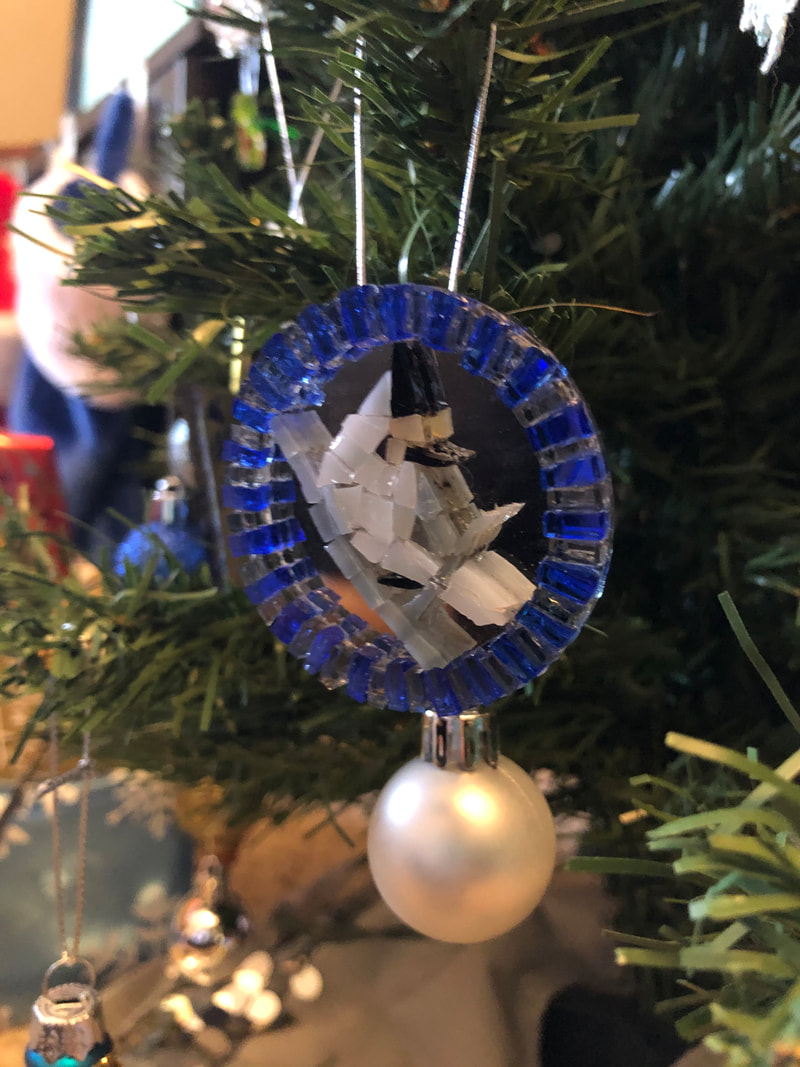 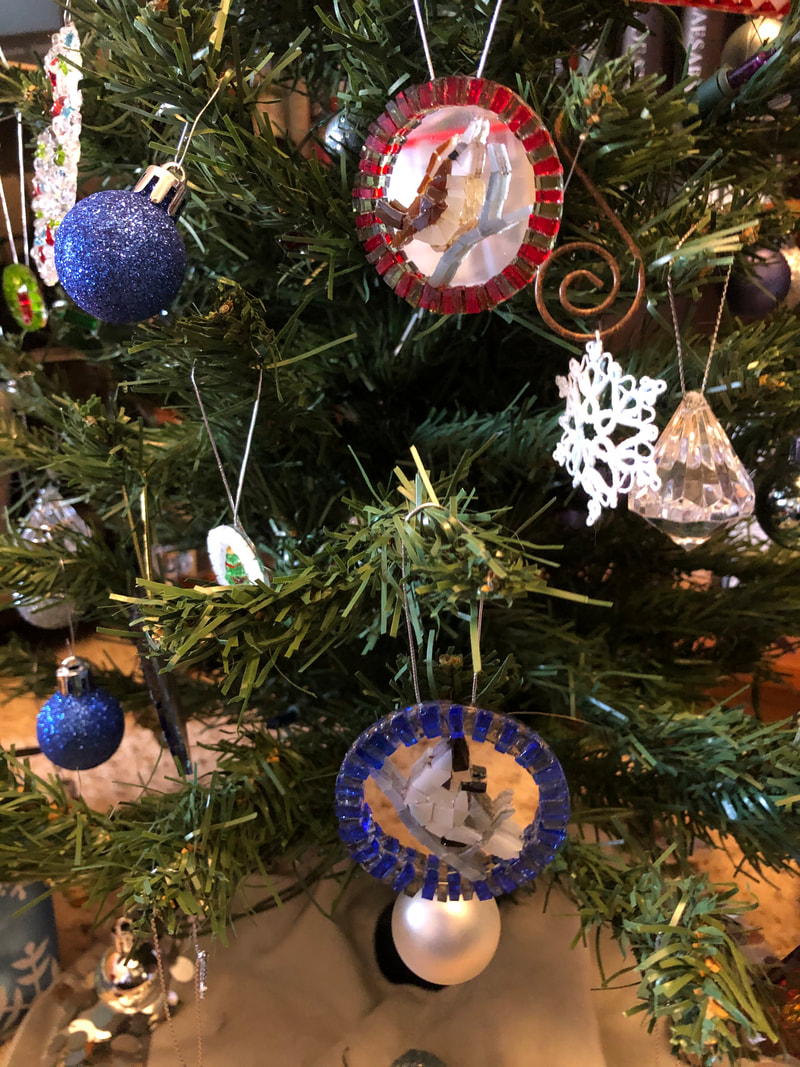 Merry Christmas and IO SATURNALIA!
0 Comments
Since I had received my order of 2 inch circle mirrors, I had to make a few more using this size. I ended my last post with the three mirrors I had made framing patterns on. Romans liked birds as do I so I decided to keep the bird theme going. I sketched out three birds--two repeats, the chickadee and wren, and a black crested titmouse. But more on him next time. 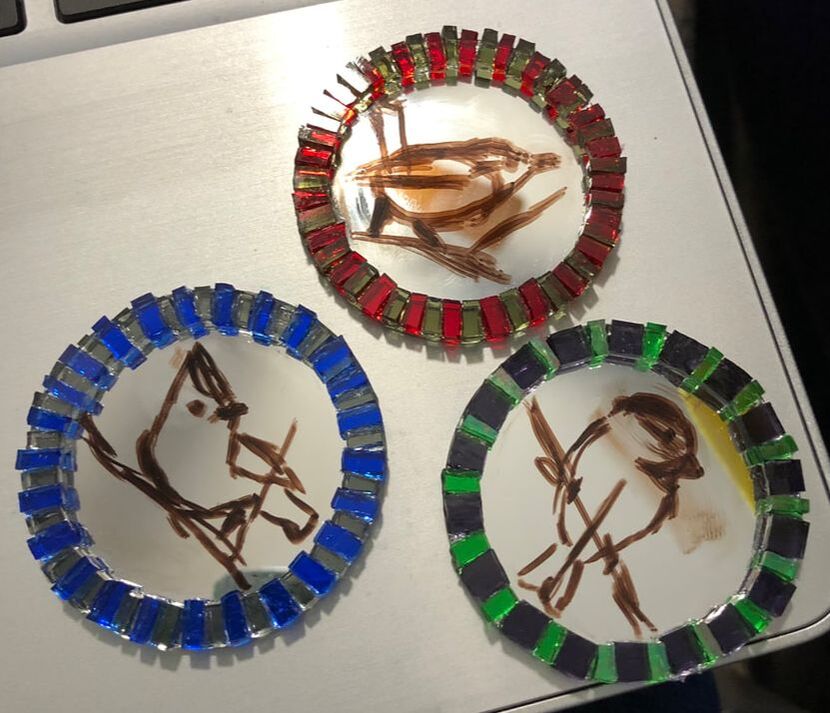 I decided to work on the chickadee first. This is the photo I was working from:  One of the biggest problems I am having is making an eye that is so small and somehow distinguished from the surrounding black. I used purple glass but I know you cannot tell. In addition, I think his head is a bit too flat but I didn't want to tear up the glass and redo it. I could live with it. This is what the ornament looked like before I cleaned all the excess glue. 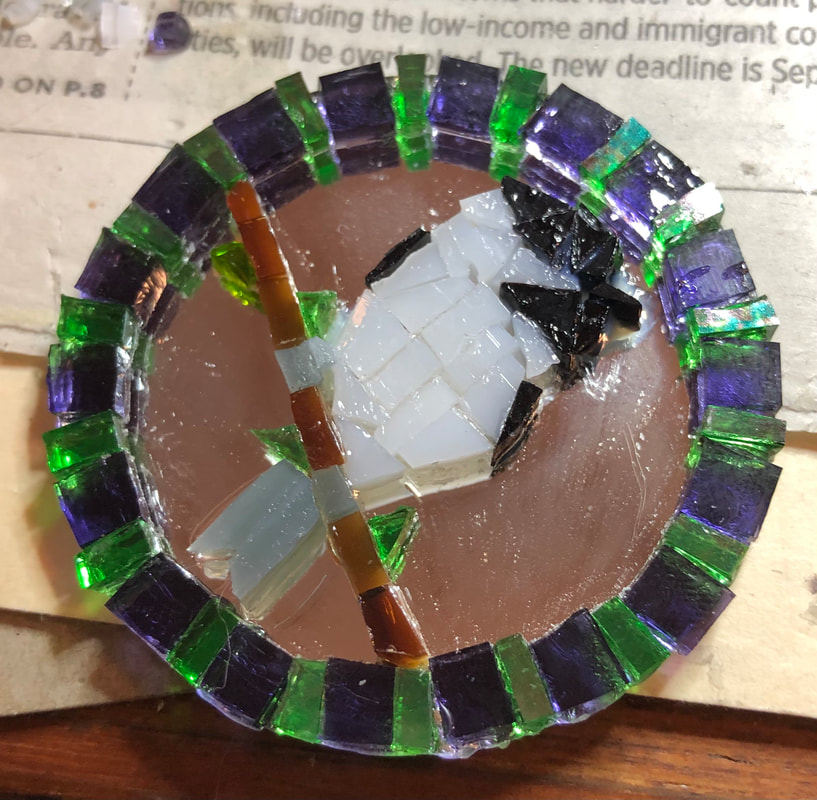 He looks better on the tree. 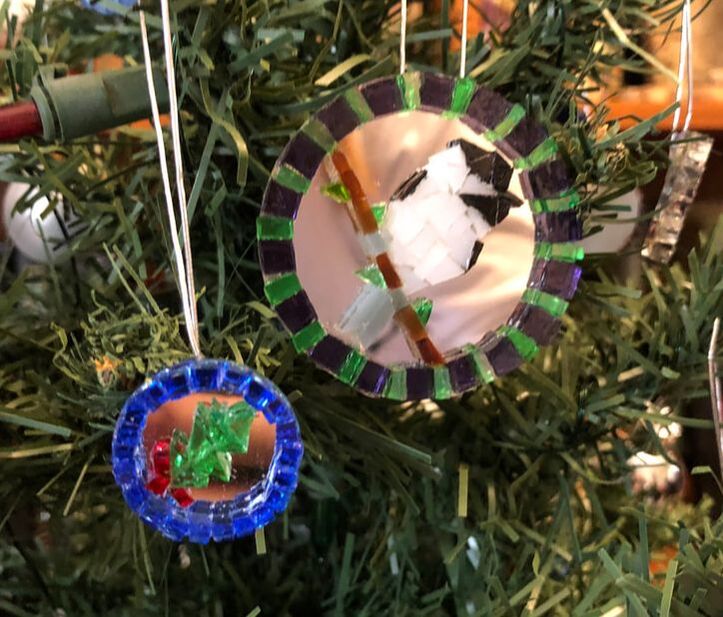 Here he is with the first chickadee: 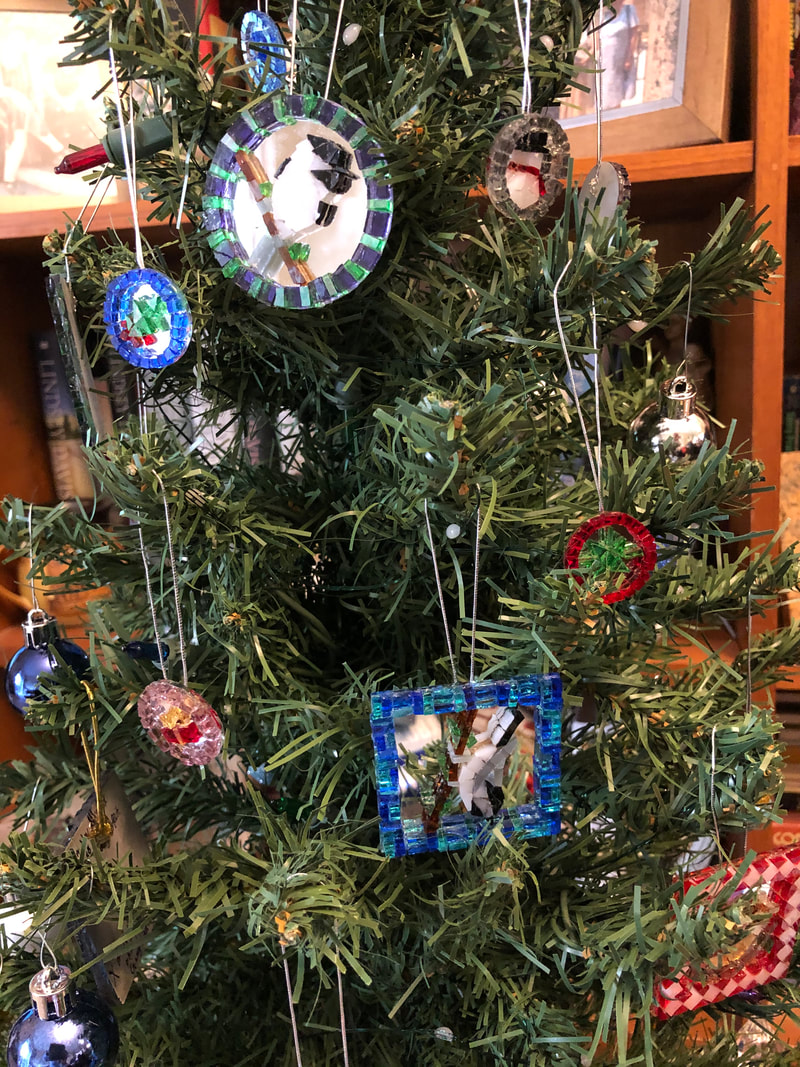 I turned my attention to the wren next. They are such cheeky little birds. Here's the photo I was working from. 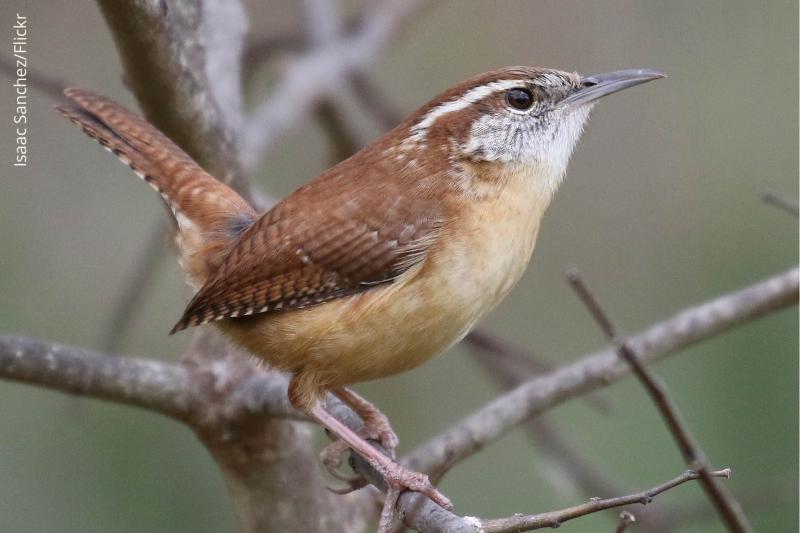 I started with the thin branches and buff chest/stomach. 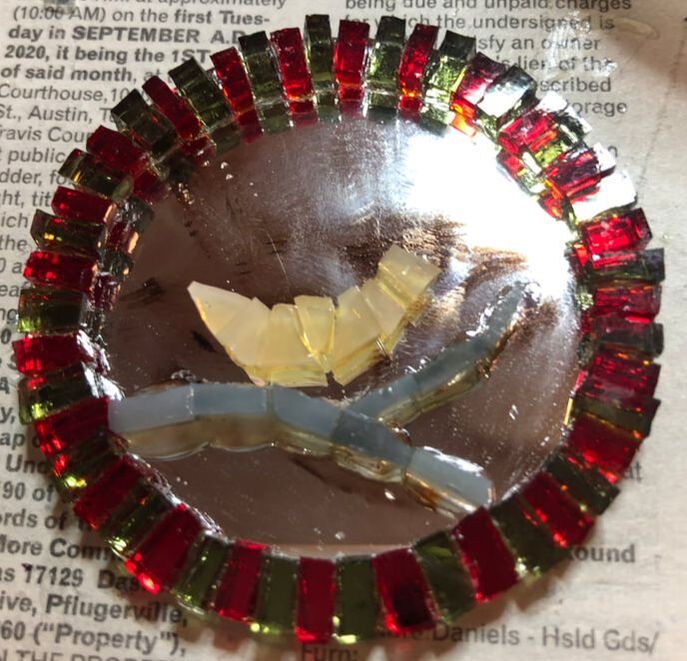 In the end I realized that this little wren, which I really like, was based on the same photo as the first one. To make it look different, I turned it on an angle when gluing the string on the back. 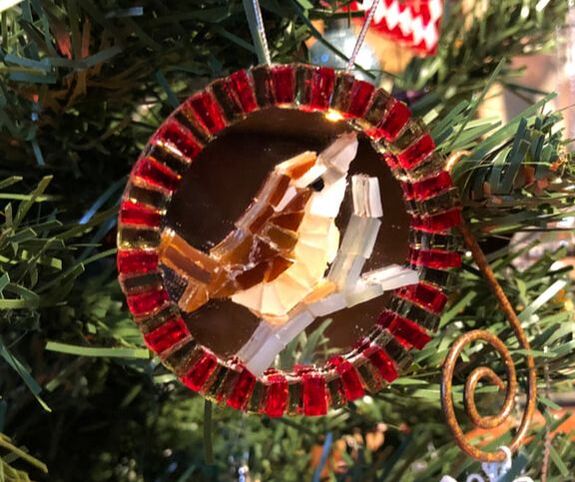 And here he is with his fellow wren: 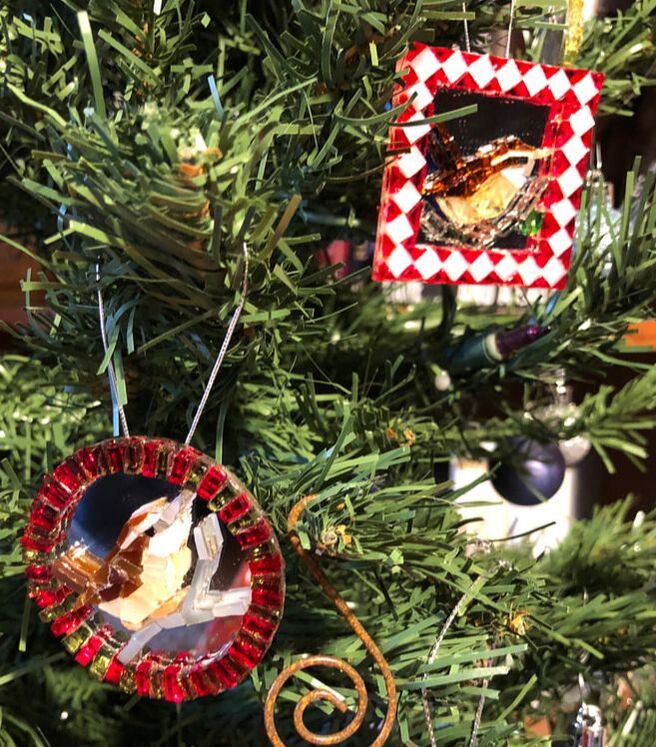 And the black crested titmouse will have to wait for next post. It is the ultimate (last) ornament, with the chickadee being the antepenultimate and the wren being the penultimate. As a Latin teacher, I had to use those words. I couldn't stop myself.
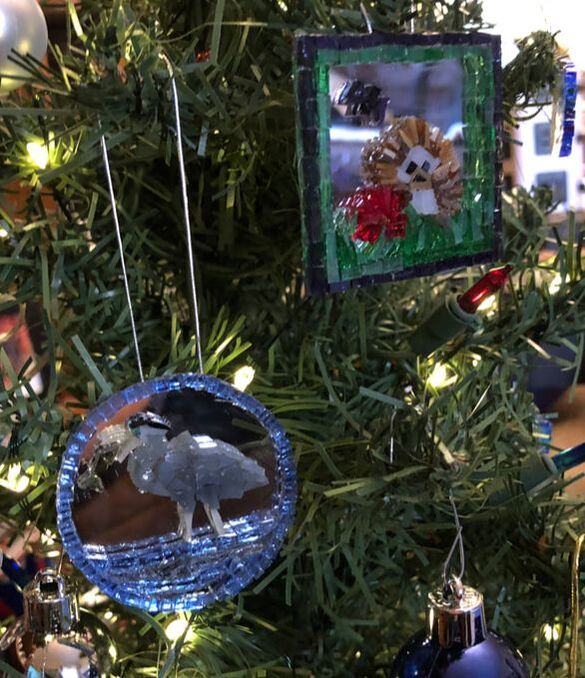 After the wren and chickadee, I ordered 2 inch round mirrors because I thought that the square ornaments looked a little awkward on my tree. My son had requested a hedgie ornament, so I started looking for a picture online that I thought might work. I was interested in the idea of this hedgie with flowers, but didn't like the composition at the time. (Admittedly it looks fine now!)  I did like the composition of this hedgie with a watermelon slice, but didn't think a melon would work for a Christmas ornament.  So I combined the two, taking the flower from one and the sitting hedgehog from the other. I made the frame first, then added the grass and the flower. 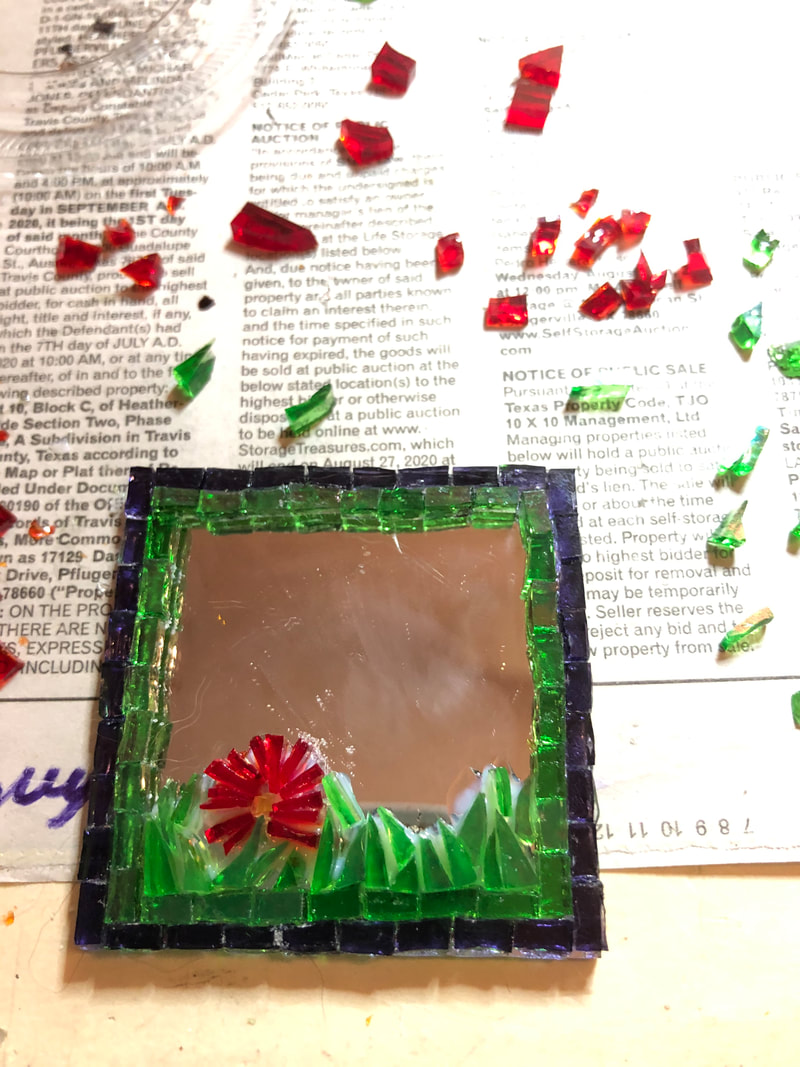 It took me a couple of tries to get the hedgie on because I wasn't getting the proportions correct. In retrospect, I think I made it too small. I added a little butterfly to help fill the space. It's a little more cutesy than I would like, but my son approved. 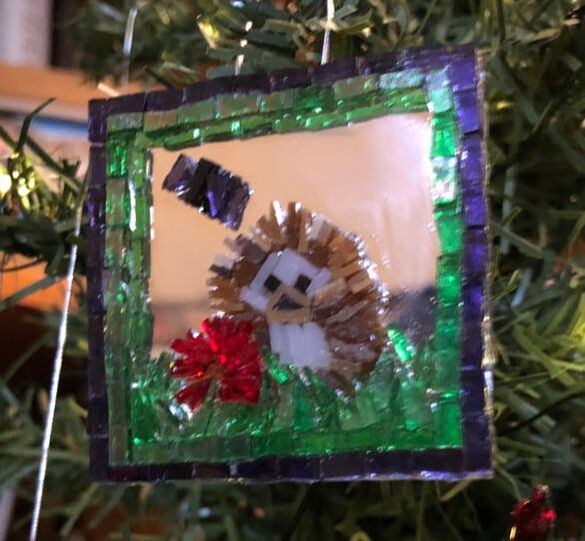 When the 2 inch circles arrived, I immediately started to edge one while I pondered what to do first. I don't know why I chose the light blue glass, but I did. And as I edged the circle, I started thinking of water. 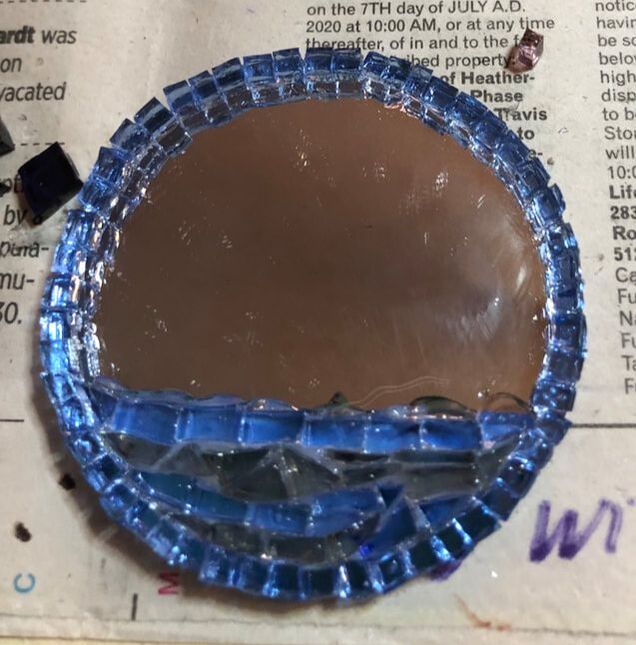 So I looked at heron pictures again. I wanted one with a fish and finally found one that I thought could work. 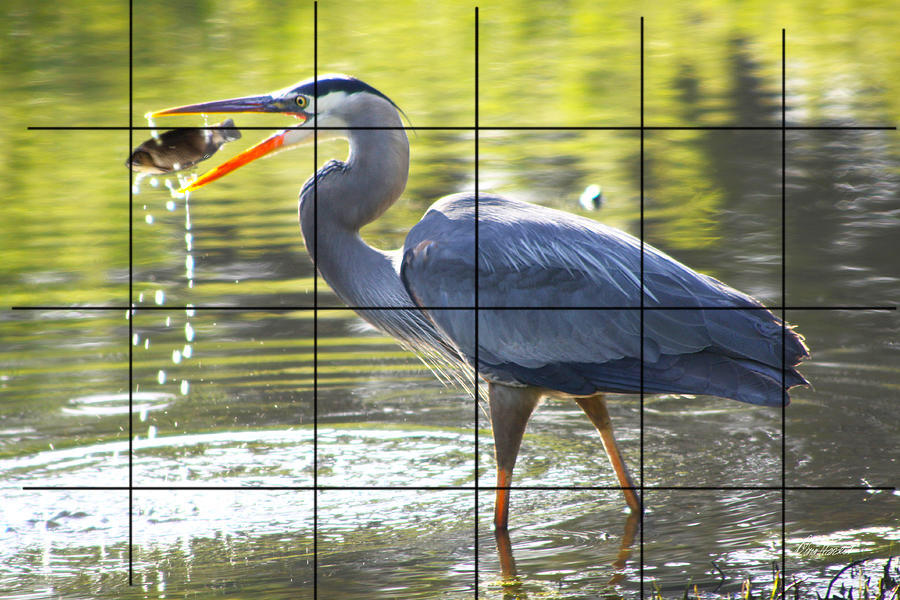 In the end, I think I was trying to squeeze too much into the 2 inch circle. I also didn't seem to get the glass as snug together as I thought. Sometimes the angle of the light keeps me from seeing this while I'm gluing. Also, it looks a little chubby--more like an ostrich! I'm glad I included the fish, even though I flipped it around from how it is in the photo. 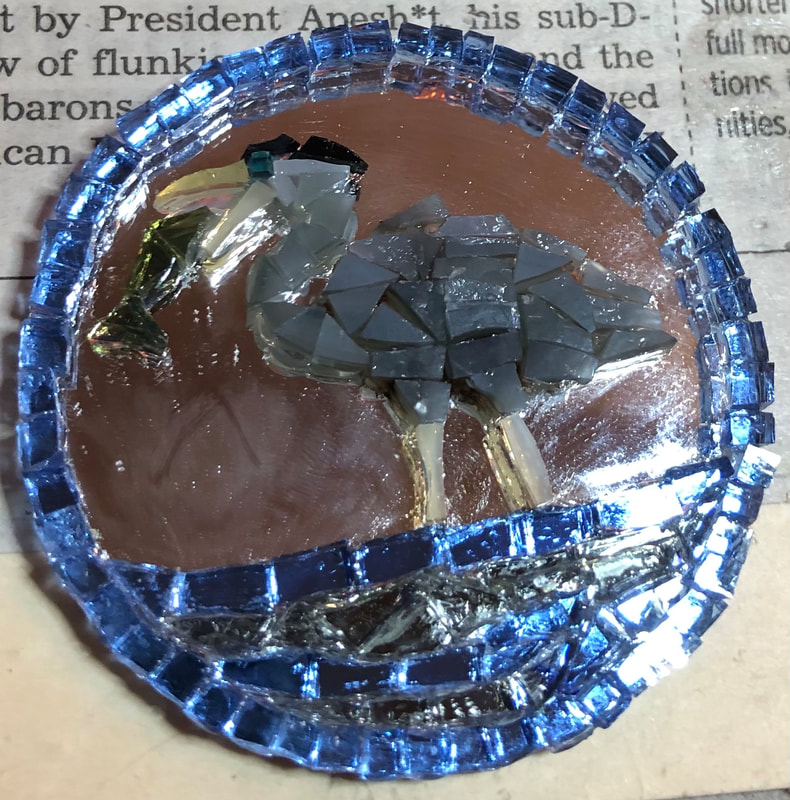 But cleaned up and polished, I think they look fine on the tree, so I'm satisfied.  In the meantime, I decided it was time to experiment with more interesting borders for the circles than just a line of tesserae. So here are three new borders... what will go in these? 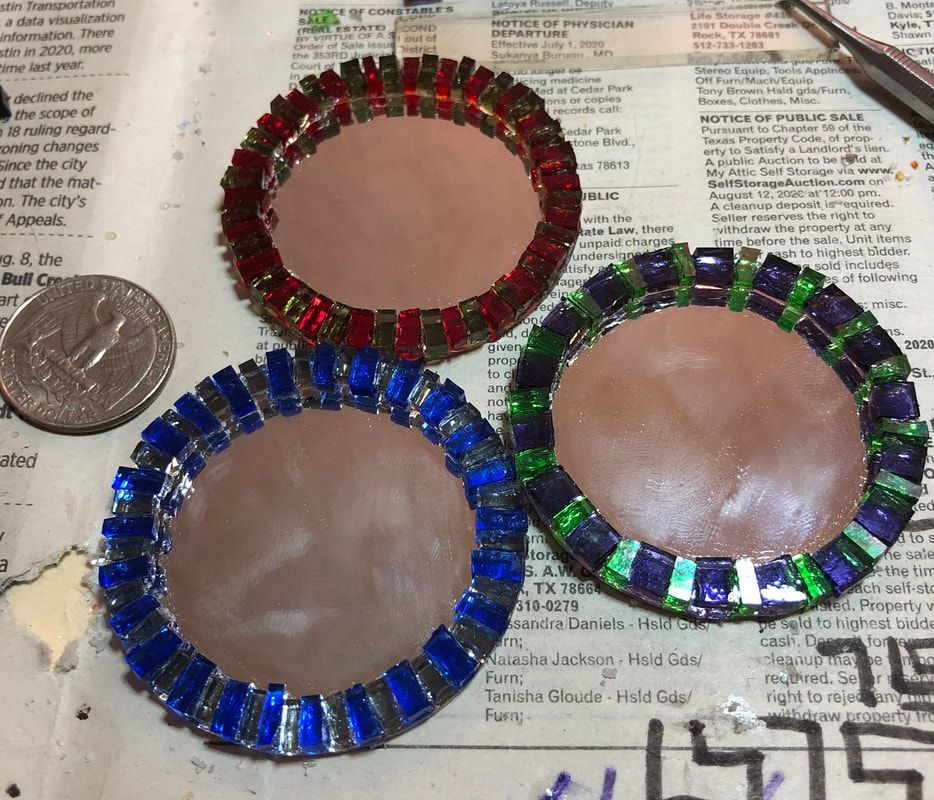 With Christmas around the corner I am madly trying to make ornaments, trying to see what works and what doesn't. While I want to get back to doing the little quarter size ornaments, I wanted to see what a couple of the 2 inch square ornaments would look like with open spaces (not completely tiled) and without grout. The cardinal and even the dove look a little dark on the tree. I also wanted to practice on simple border patterns. There's not much room for a proper mosaic border (Roman style, in my mind) on something this small, but I could manage a little something. 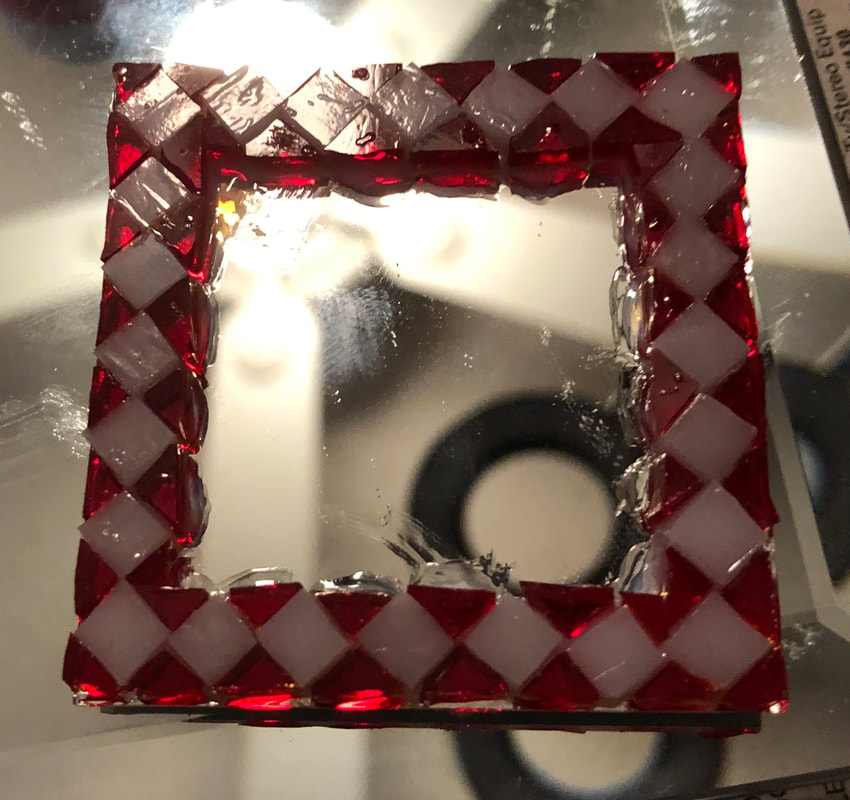 (This was a picture from when the glue was still drying.) If the pieces weren't all hand cut, it might be easier to fit them in. Even still, I am pleased with this frame.  As you can see, I had sketched out the wren and then started choosing or cutting glass to fit. 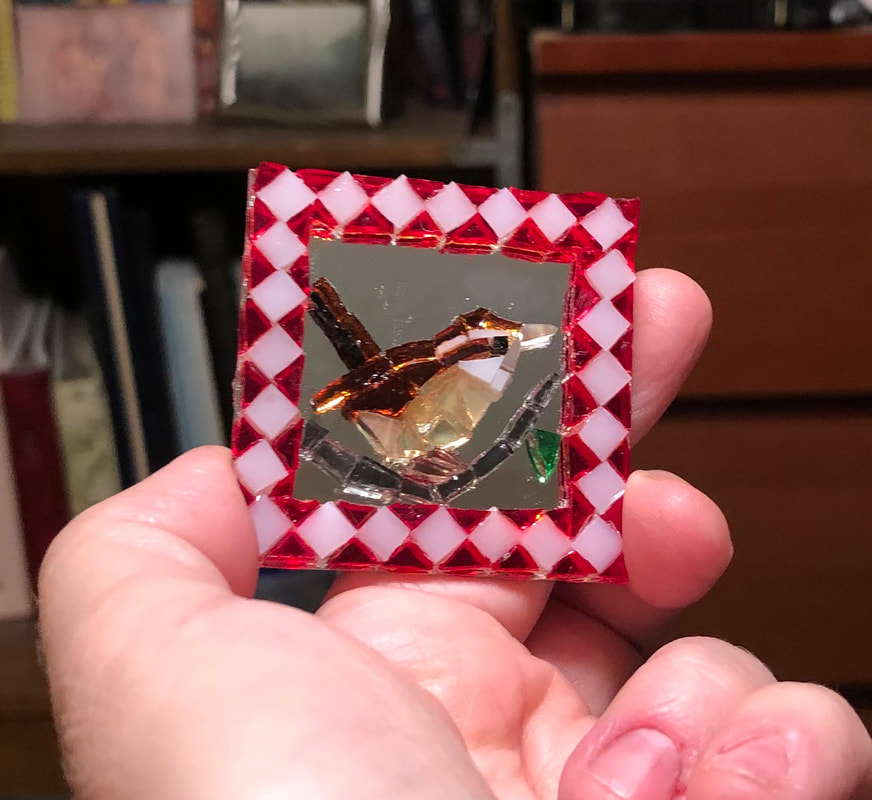 I also had made a blue frame with a perhaps odd pattern going around.  Because this frame was so colorful, I thought I would contrast it with a black and white chickadee. 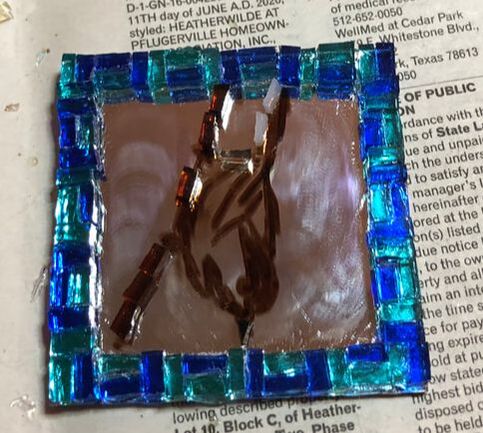 I sketched out the chickadee in an upside down perch, which I thought looked fun, and began to cut glass. 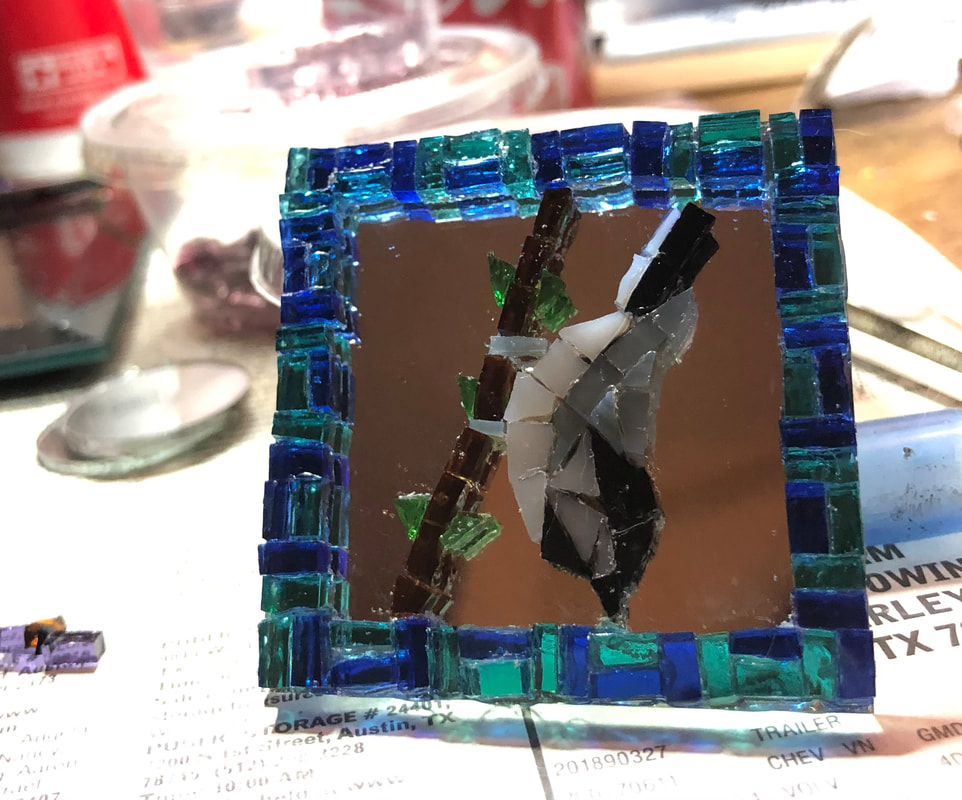 I think the end result is fun. He may be my best bird yet. It's a shame you cannot see that his eye is actually made from purple glass. It is surrounded by the black and doesn't show. 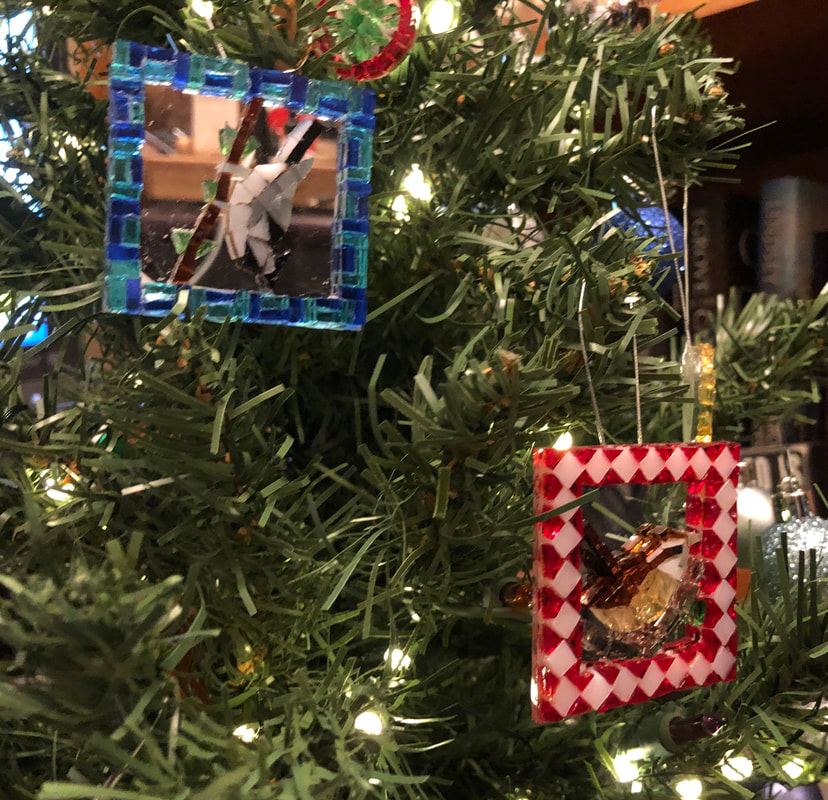 After the cardinal, I had planned to do a peacock, tail down, Roman style. You can find peacocks all over frescos in Pompeii, often near household shrines. So I thought, yes, a peacock, that's next. And then I thought about the impossibility of recreating it effectively in a 2 inch square. Thus I settled on maybe just doing an "eye" from the tale feather. I needed to cut some glass, which I enjoy doing, and I think I'm getting better at consistency. 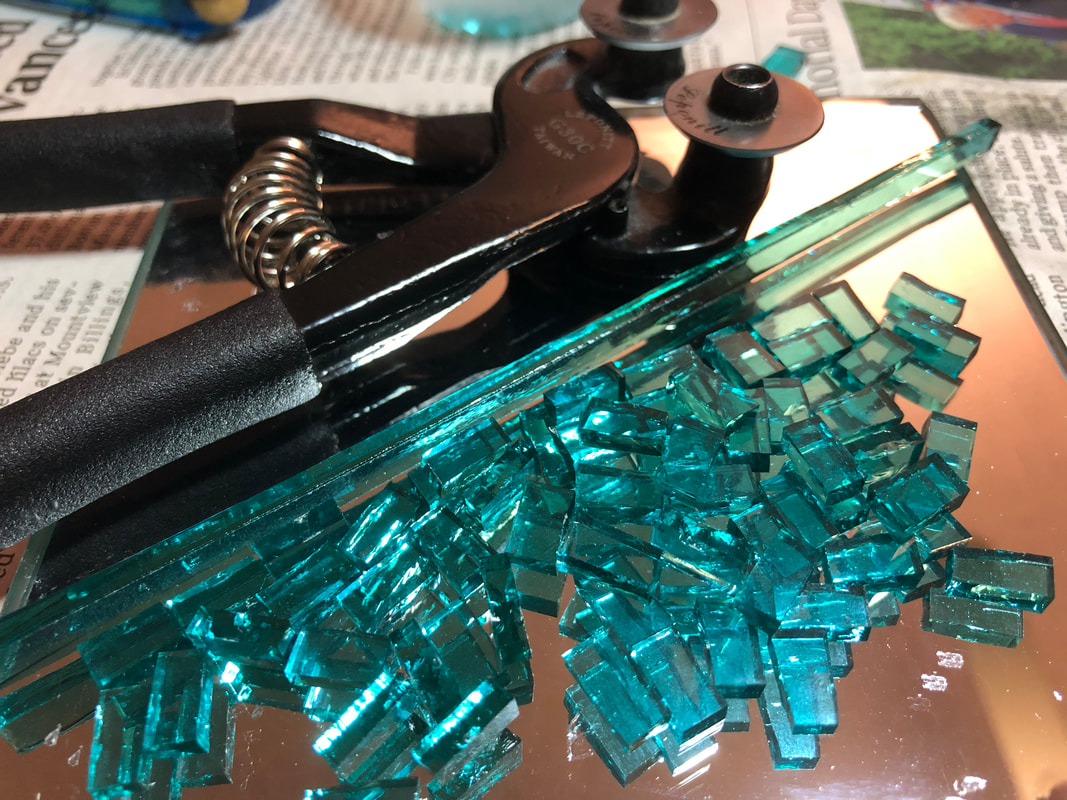 I have an aquamarine blue, which I thought would be green enough (it wasn't but oh well), which I first cut into centimeter strips, then snipped into centimeter squares, then cut in half, and cut in half again to make little .5 centimeter squares. Then I cut some of those in half too. 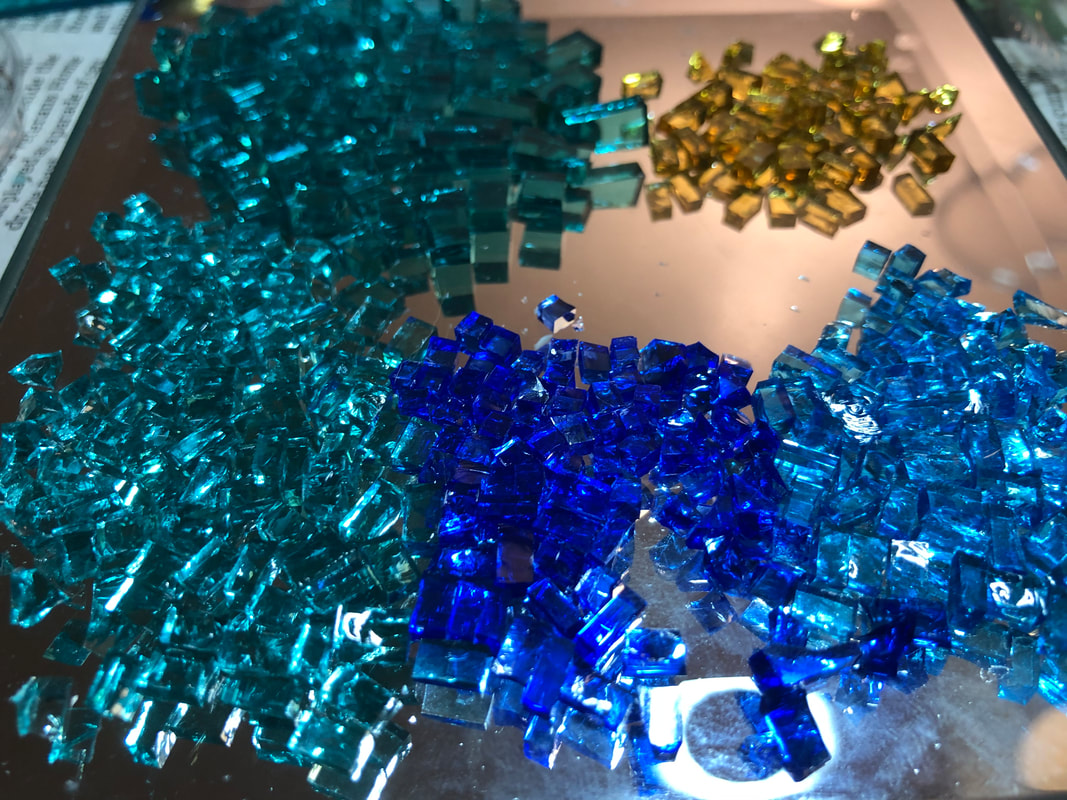 sI decided I needed to cut more of the other colors too, plus I like how pretty the cut glass looks just sitting on a mirror. But I digress. Even though I had drawn the peacock eye on the mirror, it ended up off center (too far up), plus the aquamarine wasn't very green. I really looked more like just some weird pattern. So while I was waiting for the glue to dry (and to avoid my disappointment), I turned my attention to this little one inch circles I had. I thought that perhaps I could make some tiny little ornaments for my own small Christmas tree. 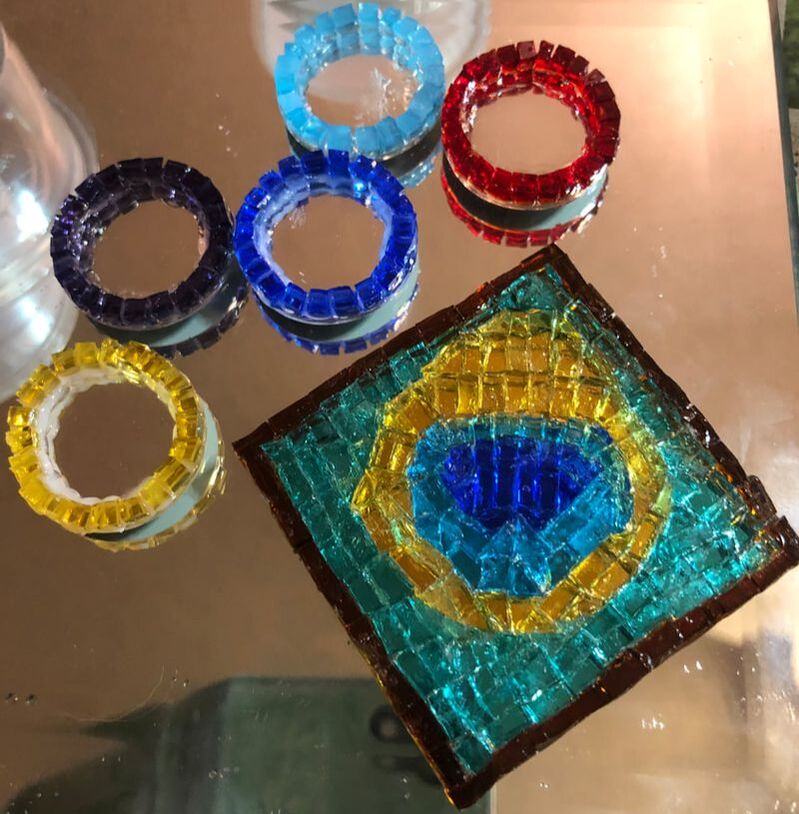 I decided to because these are so small that I would not try to fill in the little mirrors completely but just do the edges and some sort of design in the middle. But then I had this idea about making earrings... I had found this little blanks at Michael's (bottom of the picture) and thought I could glue tesserae to them. 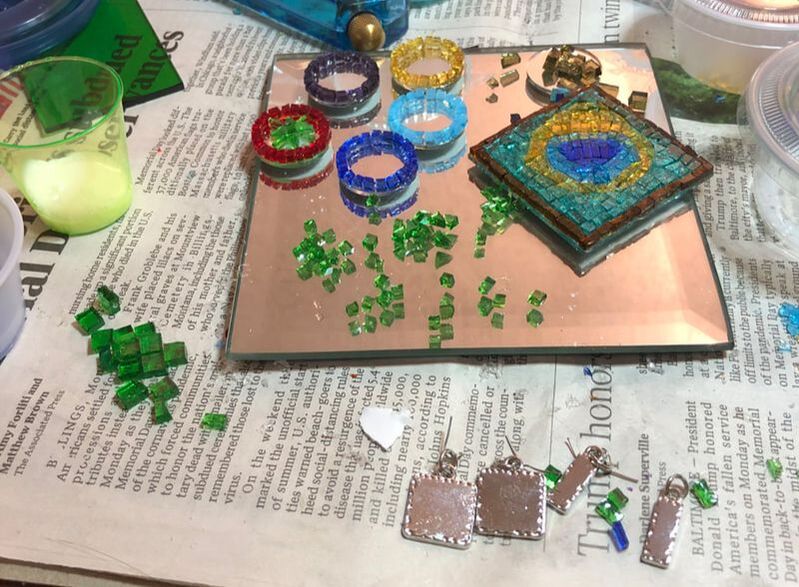 I had also splurged on a jewelry kit with earring loops that I could attach. Because the little rectangular blanks are so small, I could only think of a couple of patterns. I haven't used the square ones yet; waiting for inspiration. It will come. 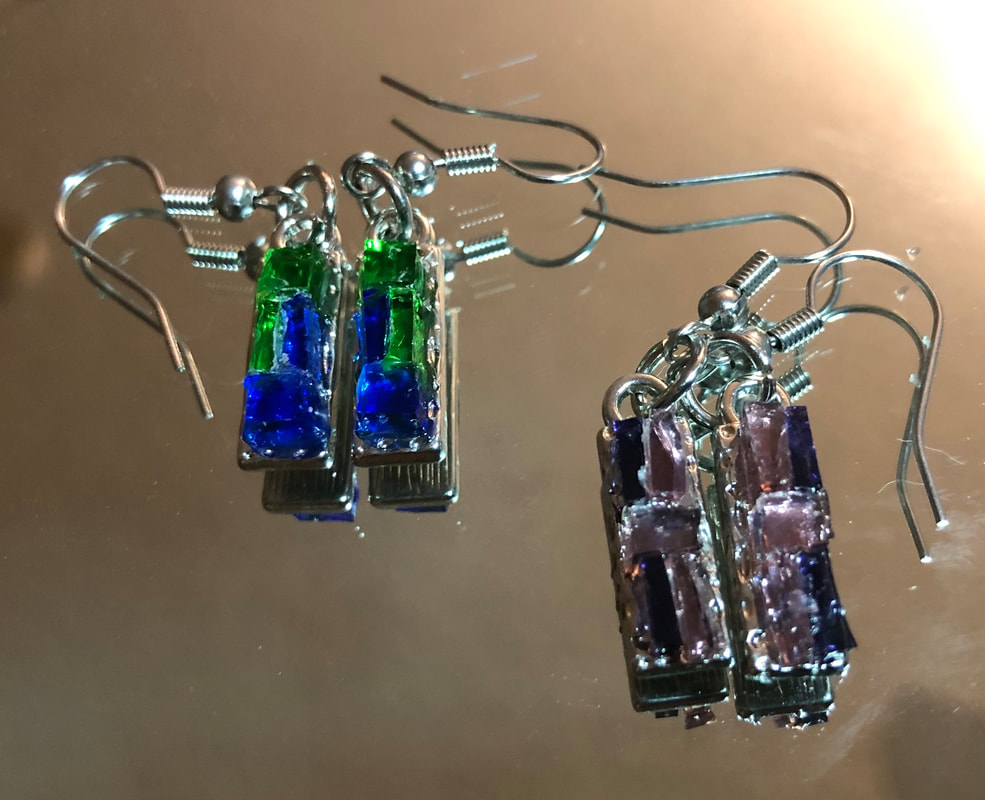 So I went back to the tiny ornaments, trying out various designs. I thought these would be quick and easy to make, but because they are so small they are a little fiddly. Also, you have to have a lot of glass cut to make sure you have the right shapes/sizes available. But here are the first dozen. I'm sure I will make more, but I have an idea for a wren in the 2X 2 inch size which I want to tackle next.... 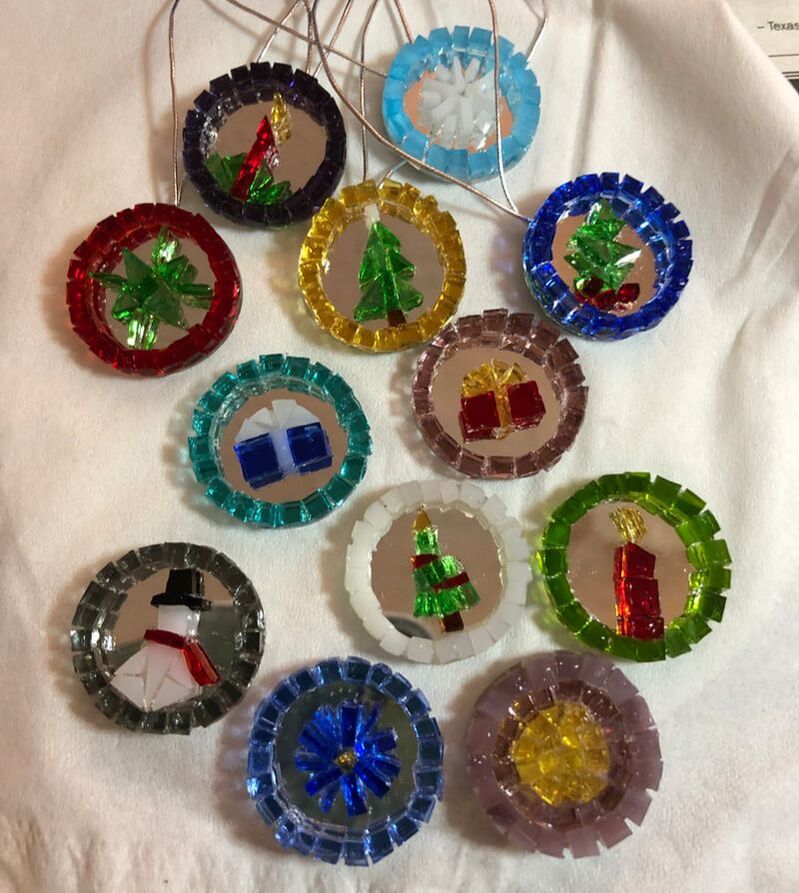 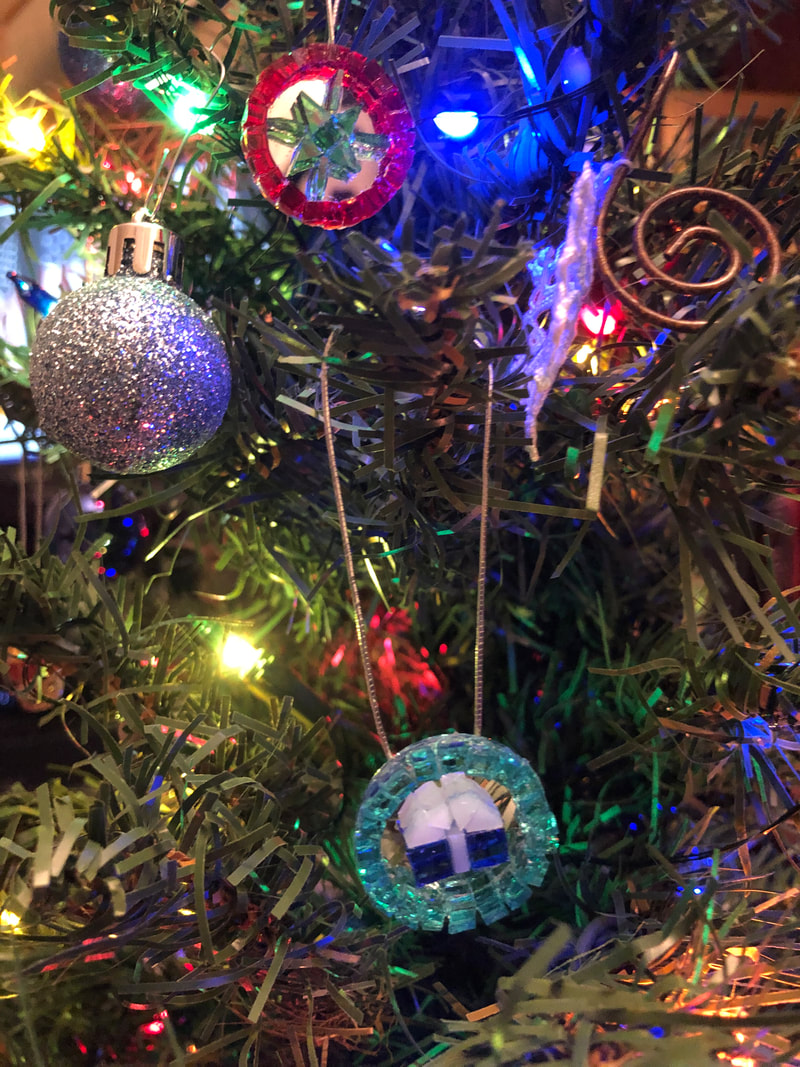 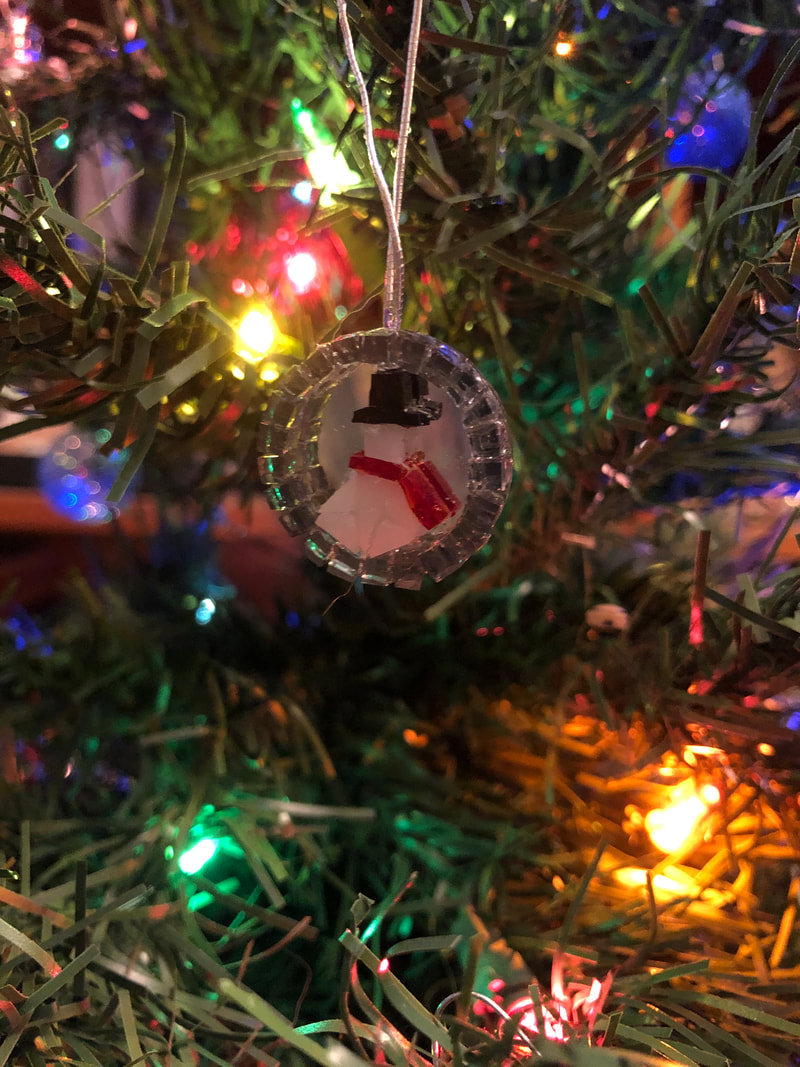 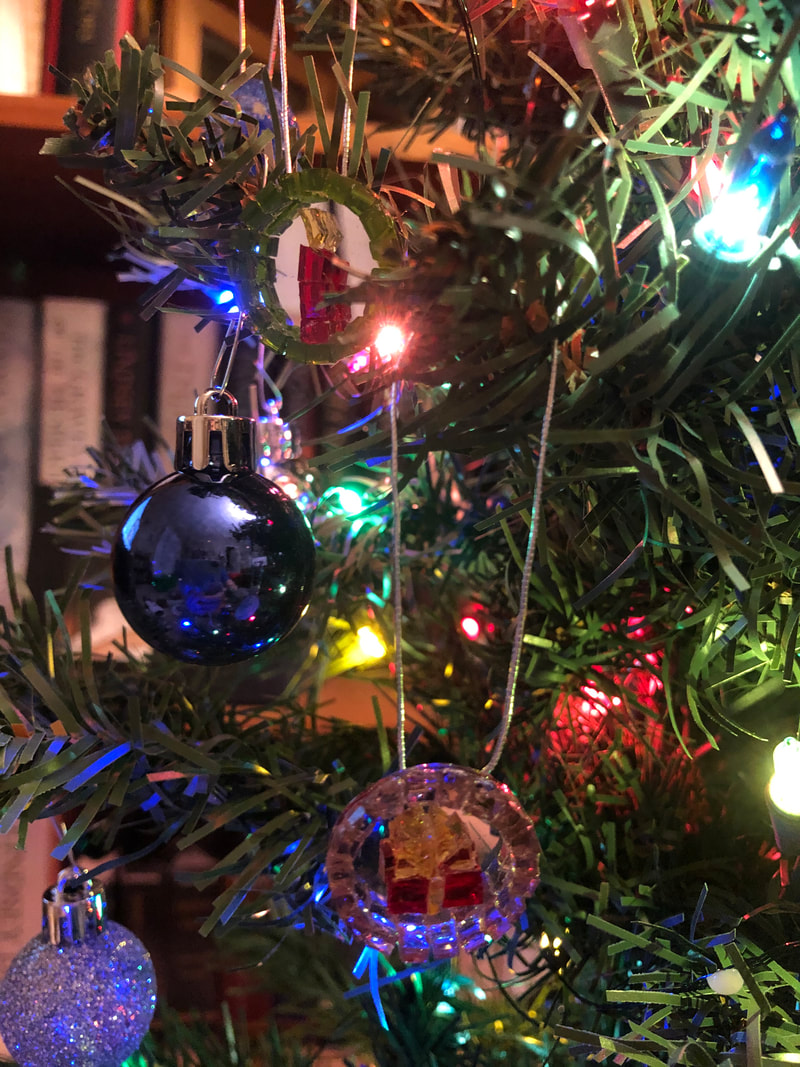 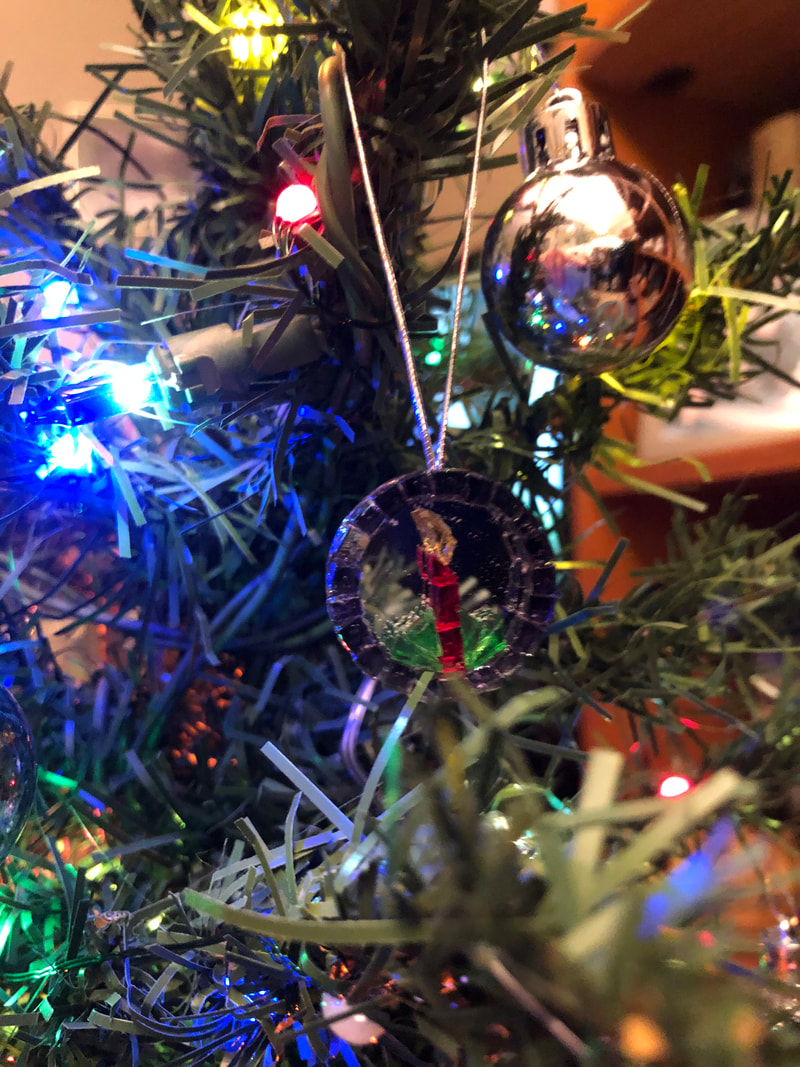 After the Dove and the Chi Rho ornaments, I decided to do another Christmas bird, this time a cardinal. I found a picture of a snowy scene with a cardinal framed by icy branches to use for inspiration. 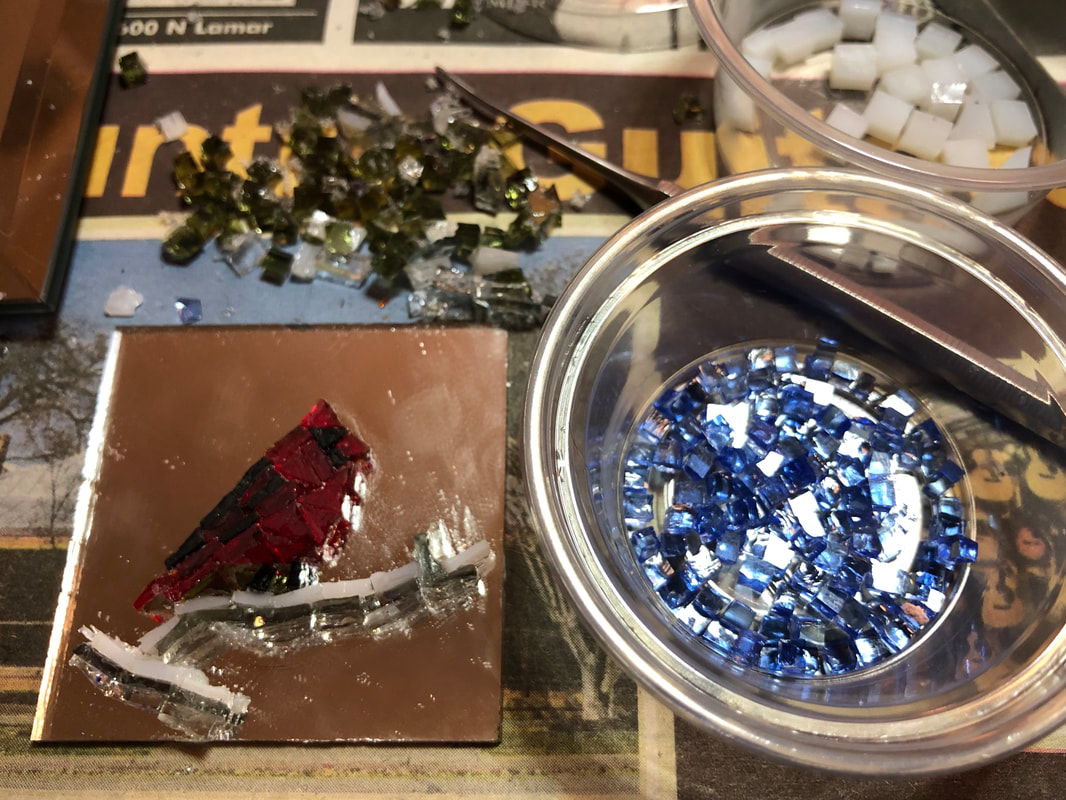 I thought my cardinal turned out well for this little 2X2 inch ornament. I began the branches with grey glass for the branch itself, white for the snow on top, clear for the ice below, in imitation of the picture. I made the mistake of starting the background in green--like the picture--but soon realized that it wasn't a strong enough contrast. (When will I learn?!) You can see the discarded green glass at the top of the picture. I switched to the light blue (in the cup). 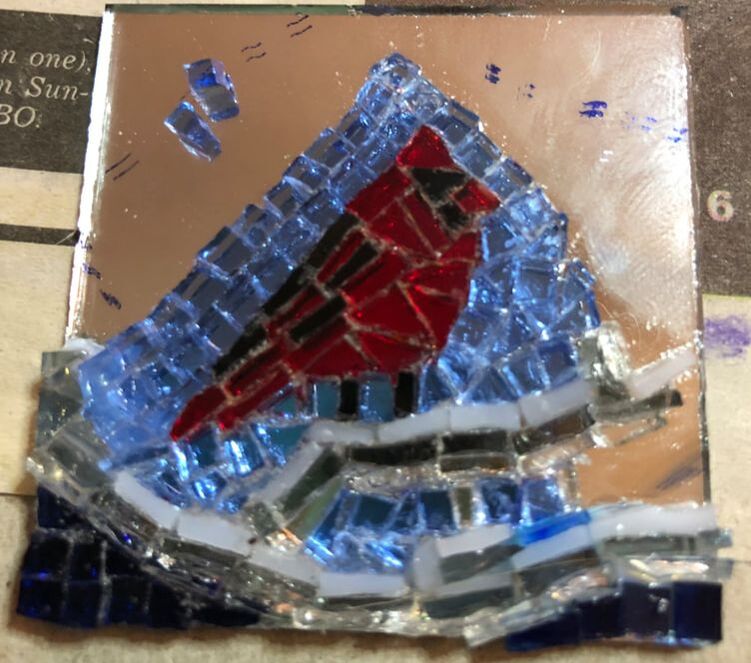 I didn't realize until after I was done that I had accidentally moved one of the cardinal's legs when replacing with the blue glass. It does make him look a little awkward here, but oh well. You can see the dotted lines I wrote on the mirror with an overhead marker for where I wanted the other branches. I also began adding dark blue glass in the corners to sort of frame the picture. 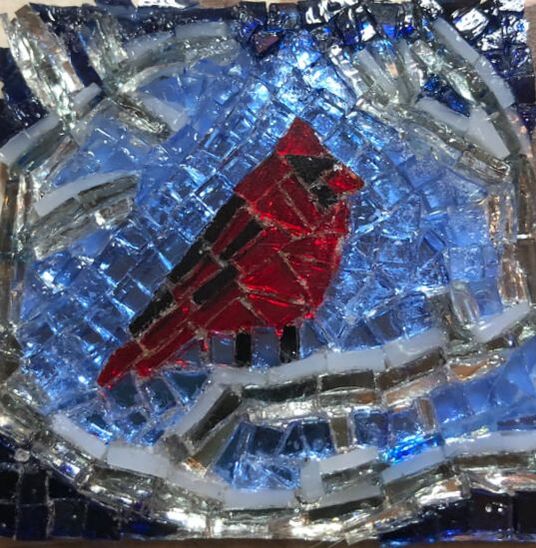 It didn't turn out quite as beautiful as the photo I was working from. The branches do not come across clearly as branches. I should have simplified or perhaps used opaque glass for the branches. However, I was pleased enough. 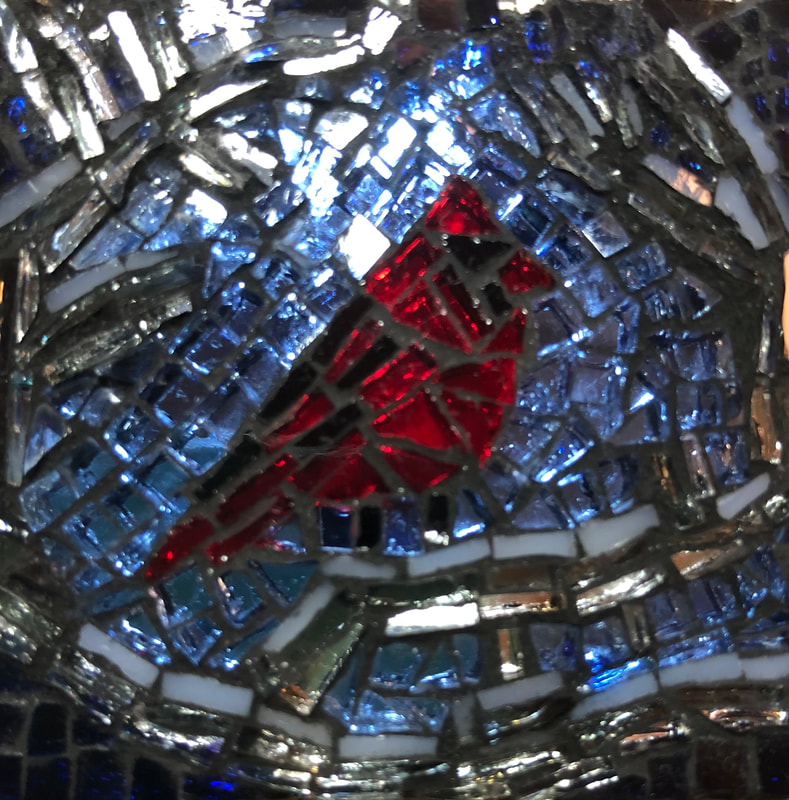 I think the grouting went ok and the glass polished up nicely once I cleaned off all the excess glue. Here are the three ornaments I had made up to this point: 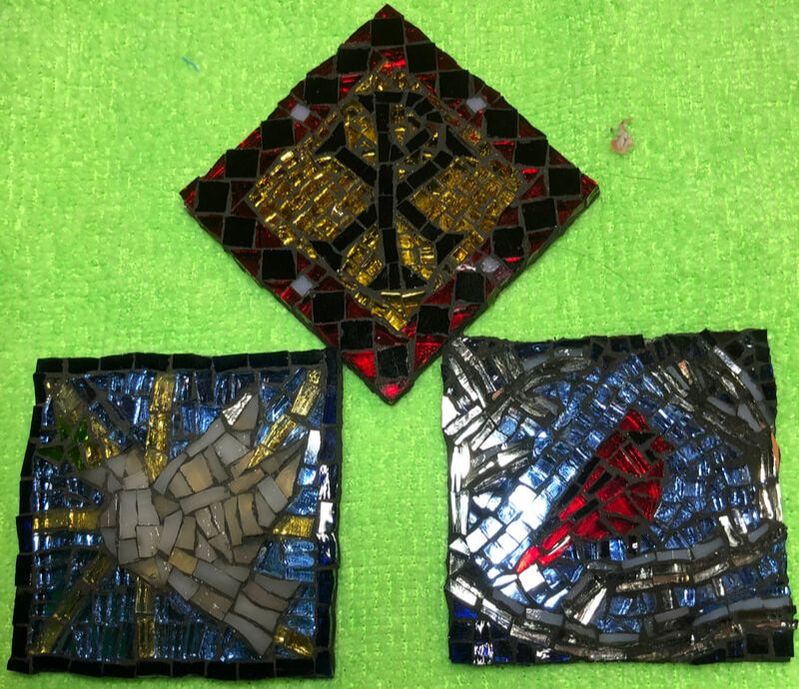 I decided that I really liked having a border and wish I had put one on this cardinal. I really like the border on the Chi Rho, but it takes up space. But it does make it look cleaner and more professional.
In pondering what other small 2X2 inch ornaments I could make for Christmas, I decided upon a chi (X) rho (P). These Greek letters are the first two letters in the word Christos and were an early Christian symbol. I believe the cross didn't become a symbol for another century or two. Early Christian burials will have doves (but come to think of it, so do some pagan ones, especially those with children) or a Chi Rho as well as an Alpha & Omega. As a Latin teacher and a student of Rome, I will never see the cross as something unique but rather a favorite method of torture and execution for the Romans. Plus, it really makes me think of the Spartacus rebellion and all the slaves crucified along the Via Appia. Anyway, my goals were to see if I could make clear, clean letters and create a nice, even border. I began well, even had a paper guide on the edges to help keep the alignment smooth, but I eventually gave it up, for better or worse. The paper frame was in the way when I was working. 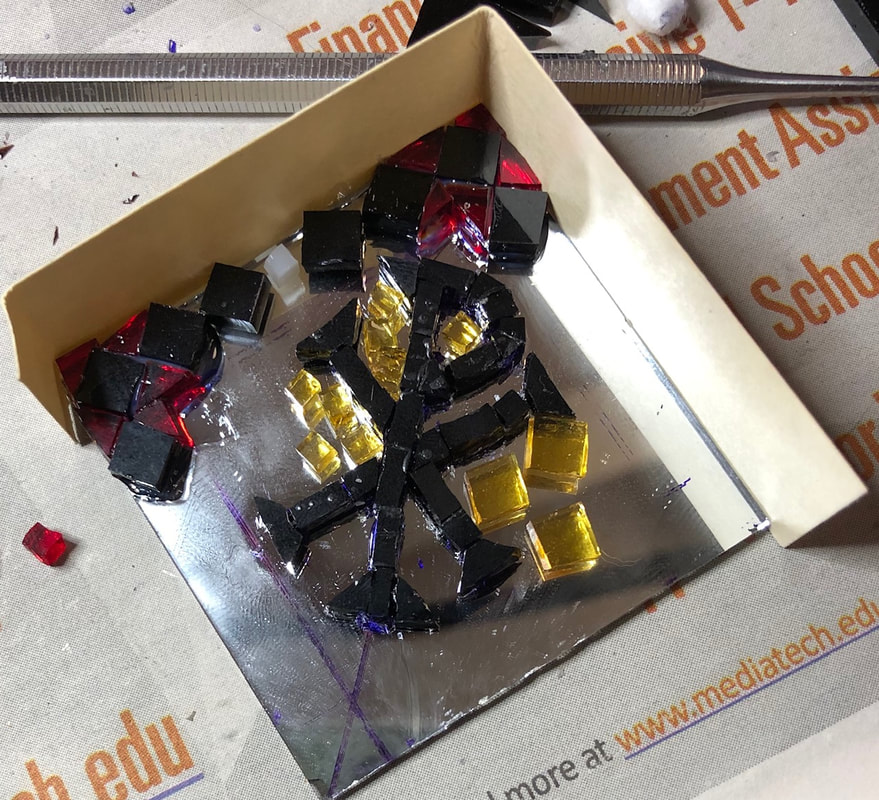 Here's a close-up of the corner. Because I'm cutting all of my tesserae from stained glass with just nippers, the pieces are not perfectly shaped, which this close-up reveals. However, I think that makes the mosaic look a little more interesting, and less like some sort of factory craft kit. 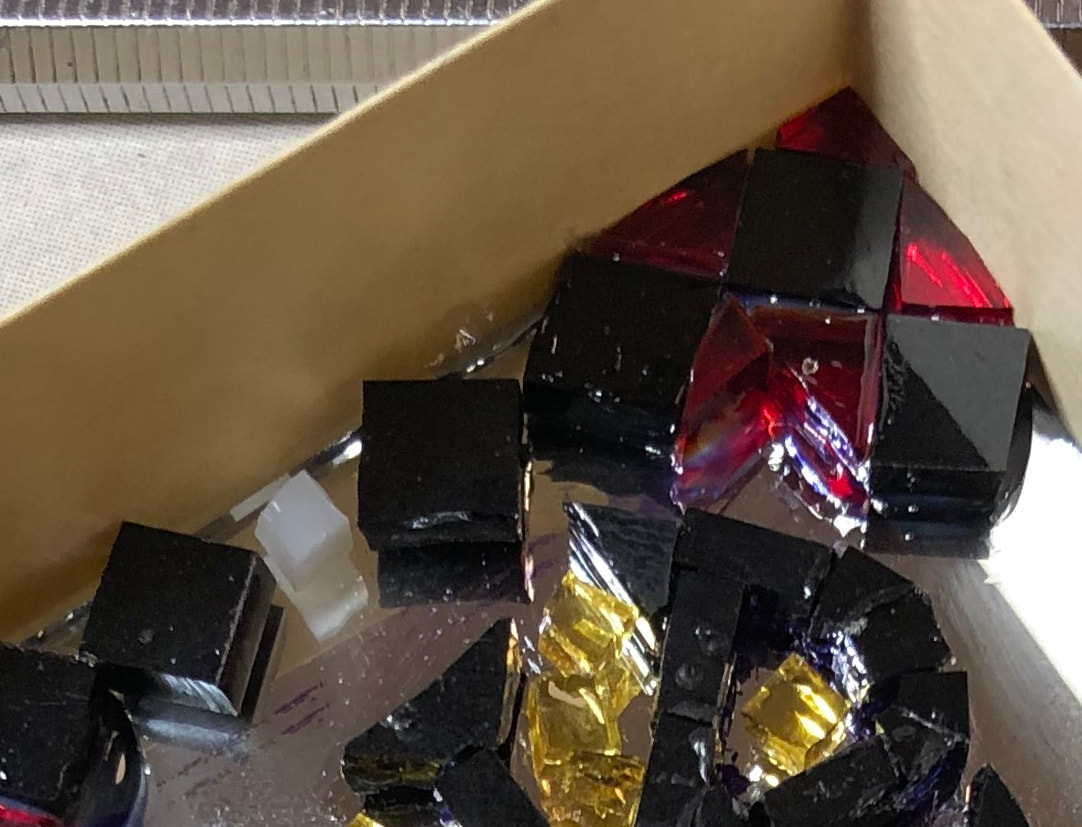 In this picture below, you can see one side of the red and black completed. I should have done the whole border before doing anything else so I could focus on symmetry and consistency, but thought I might find it easier to mainly go from one side to the other after I had completed the chi rho. You can also see my completed dove and two little quarter sized mosaics. I was trying to determine whether this little 1 inch circles were too small to make anything on, but decided to start with circles of blue glass just to see. Suddenly it looked like a little geode to me, so I made a second one with purple and lavender glass. They are frivolous but fun. I may make more. 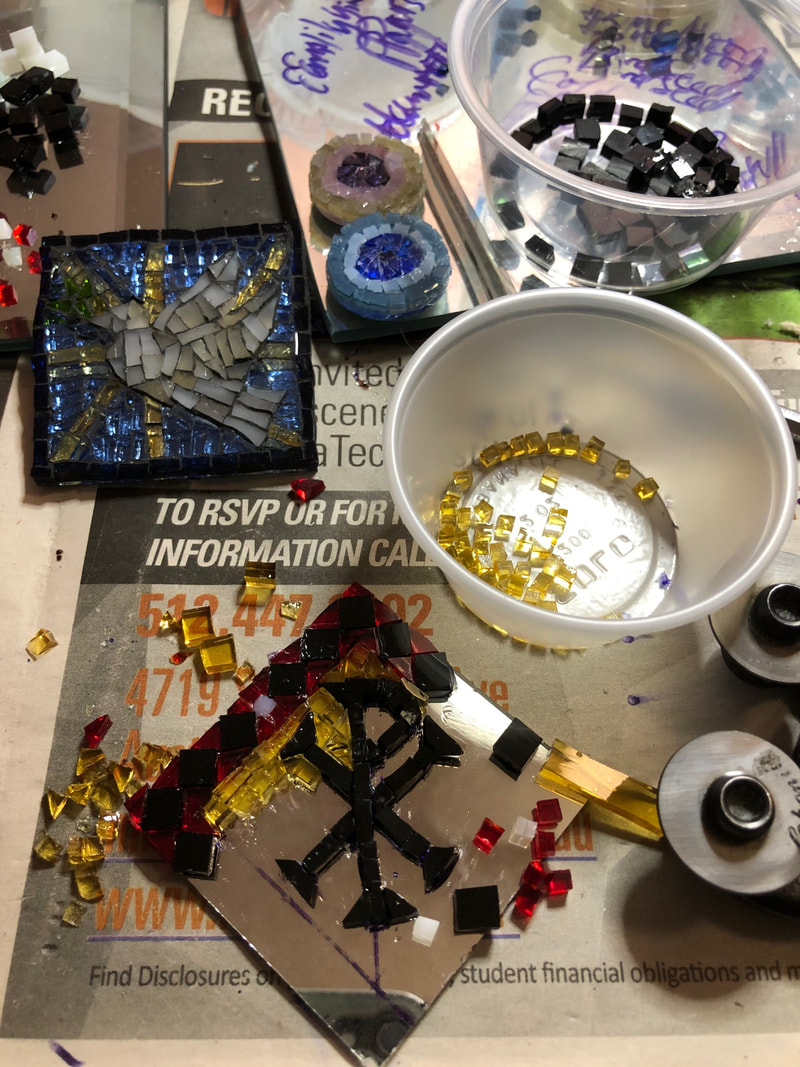 You can see the completed Chi Rho below along with the little fake geodes. This was right after I grouted all three. As you can see, my red border didn't stay quite as even as I would have liked, but I think it is effective and otherwise is an appealing piece. Eventually I will add ribbons or something and hang it on my Christmas tree. I always wanted a Roman themed (whatever that means) Christmas tree, and I think this will be a start. The next ornament, I think, will be a cardinal. Time to cut more glass. Stay tuned! 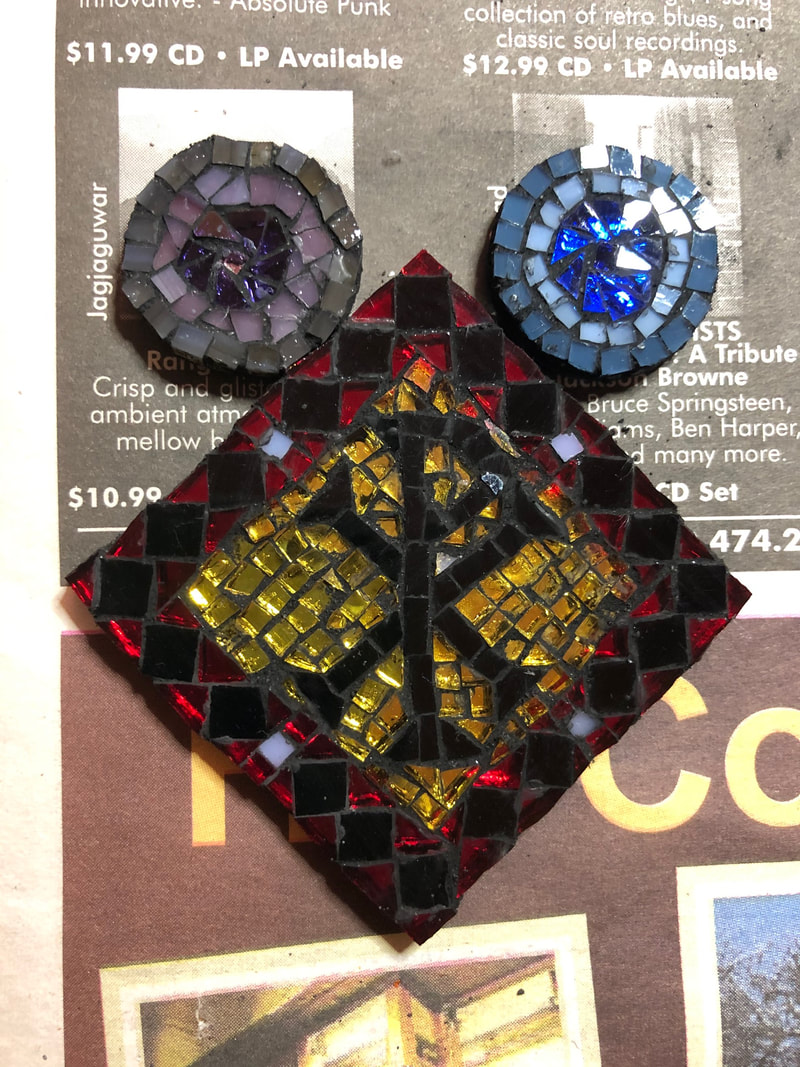 I bought a pack of little 2X2 inch squares on a whim a while back and decided I should see whether I could think of something appropriate for an ornament. I needed a break after the last big project and wanted to do something small. 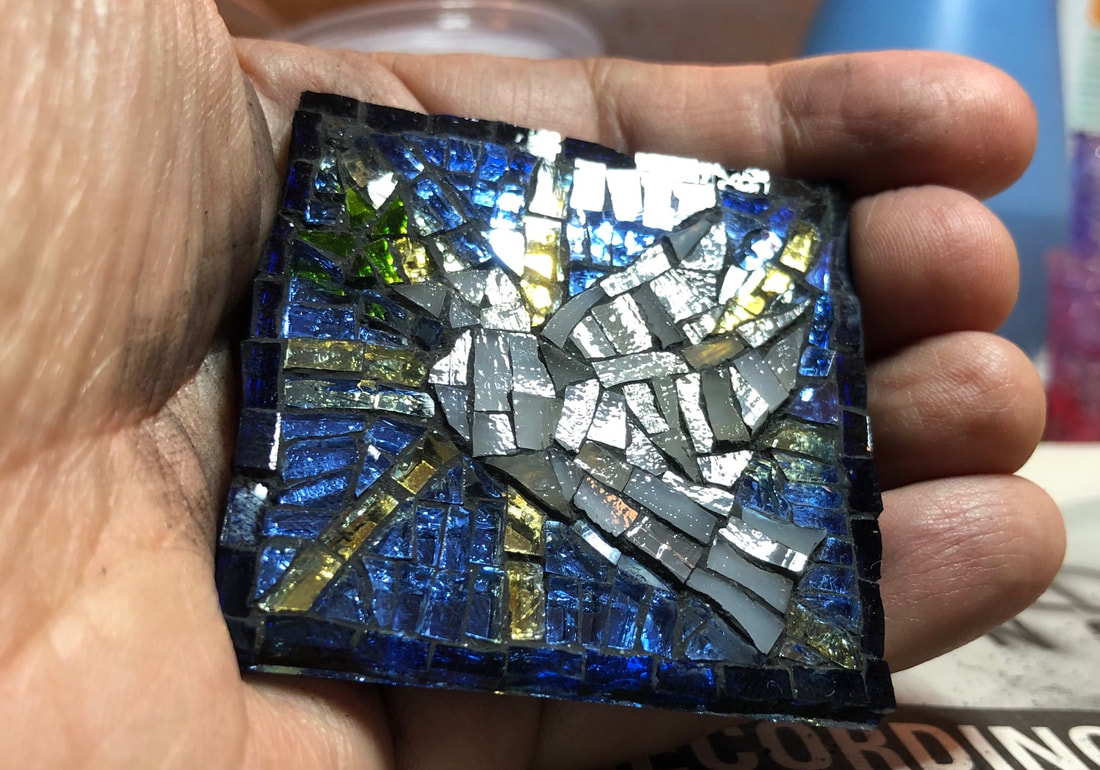 With the light gleaming off of the polished surface, it looks pretty neat. Straight on it is not as dazzling. This picture almost seems too up close and personal, with all the imperfections showing. 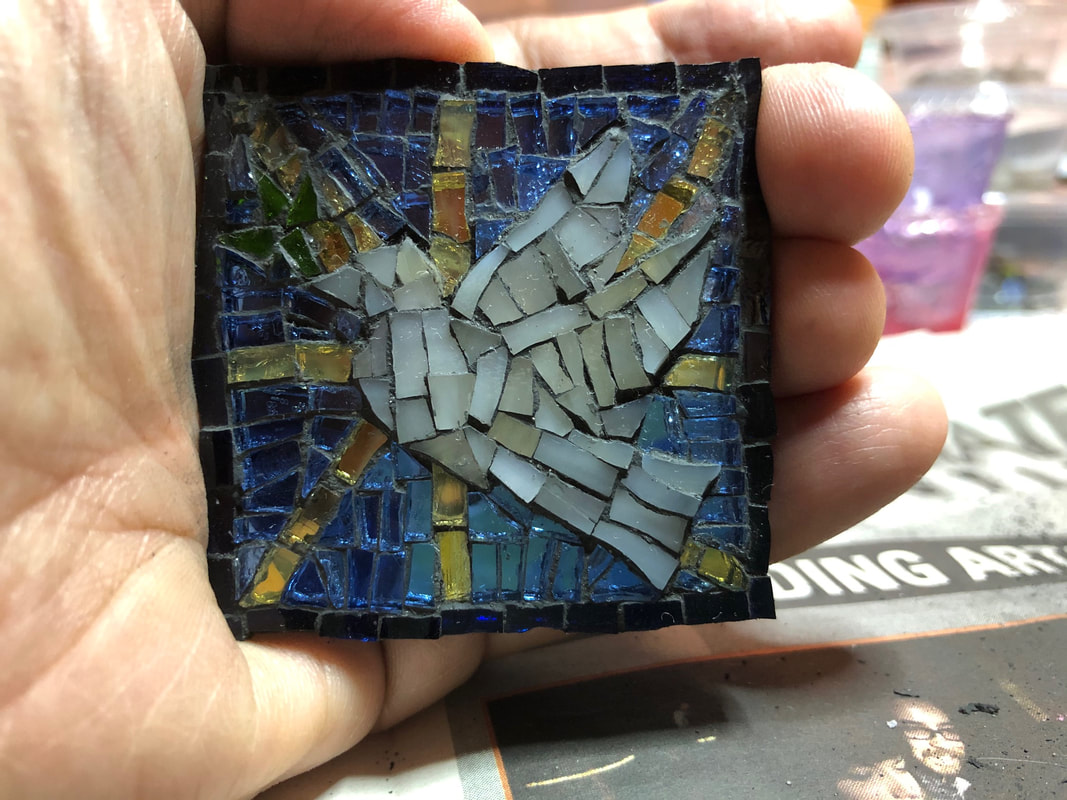 However, I am pretty pleased with this little project. Here's how it began. First I drew on the mirror with an old overhead marker. 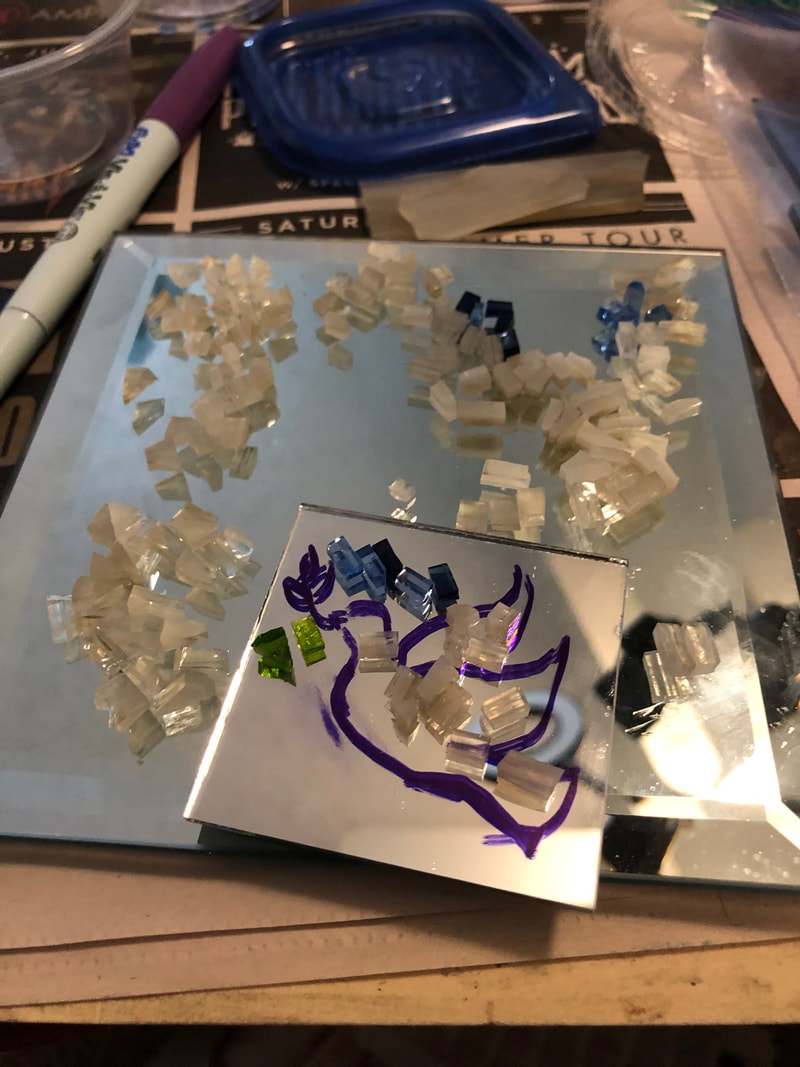 I knew I wanted the dove to be white (of course). I like to try out other colors by placing them near each other. 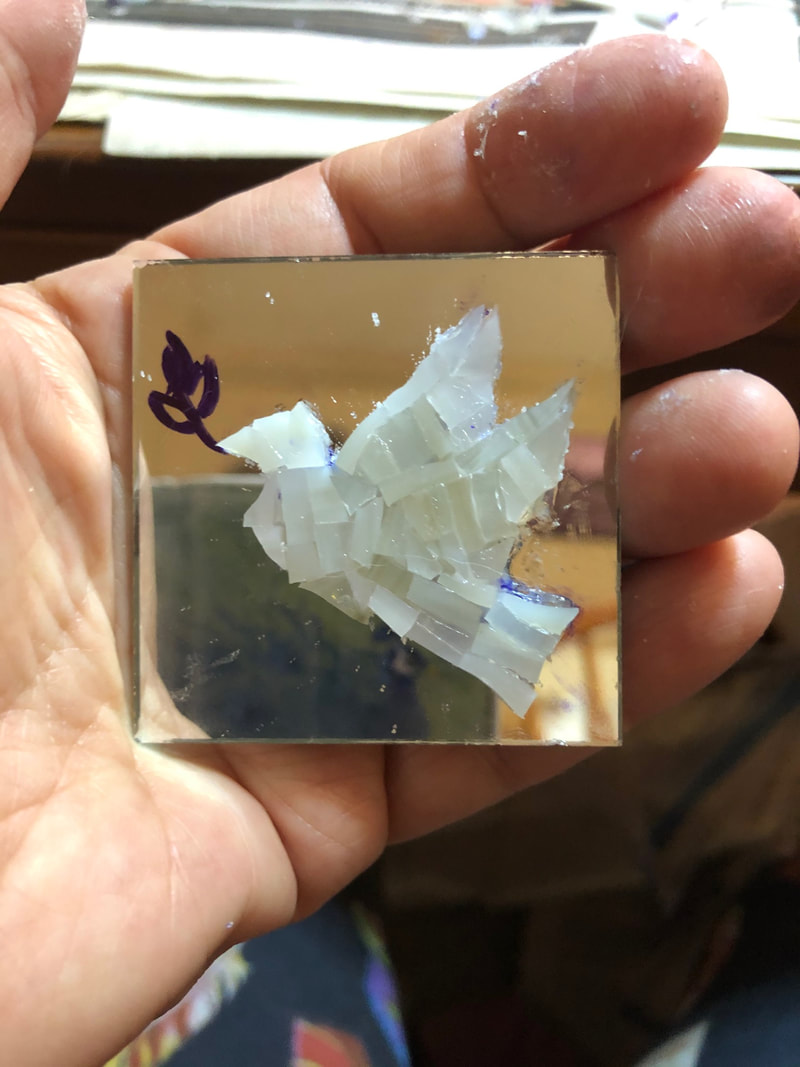 I began with the dove, erasing the purple lines as I worked. 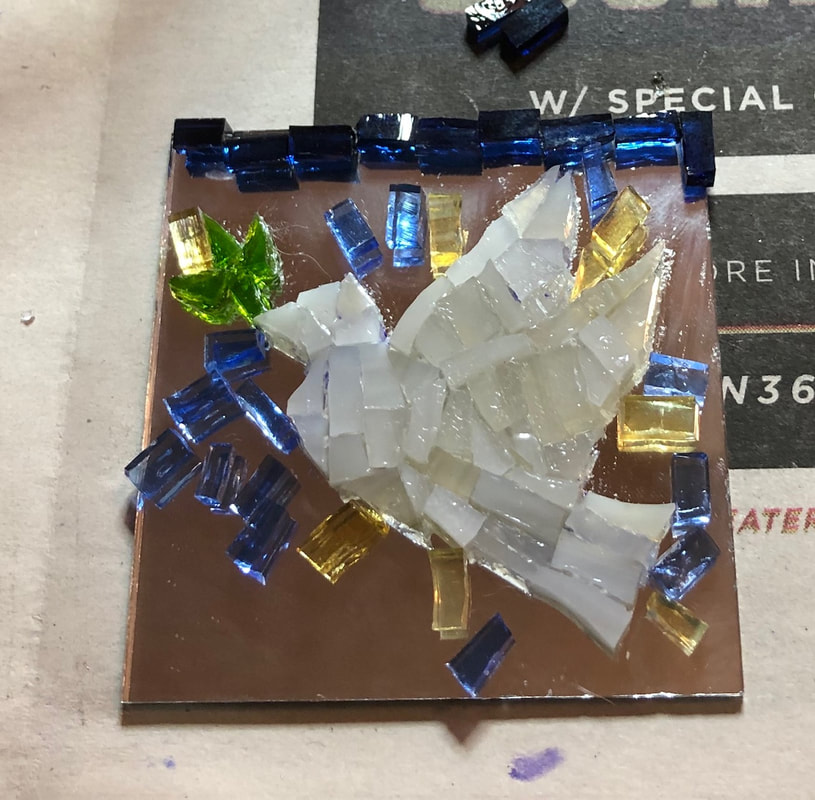 Then I checked my color plans again, and kind of laid out some patterns. One of the biggest problems I have is that I don't work on the mosaics at consistent times. And if I'm working late at night, and then skip a day, on the following day I might forget some little aspect to what I was doing. For instance, if you look again at the completed dove, you will see that I was not consistent in how I treated the yellow starburst. In the top right corner, it is bordered by light blue glass going in the same direction. Actually, the corner looks fairly messy, and the yellow isn't even straight. It was the first corner I did. The last corner was the bottom left, which is very straight but I totally forgot to have the blue glass going parallel with the yellow. I could continue to pick it apart from the edges not being perfectly straight to the starburst being off center, but it's art. It's in the moment. I wasn't going for absolute perfection but the joy of creating. And when the light hits the shiny glass, it's lovely. Finishing the heron has been a slow process. And while I was pleased in many ways with the water portion, I did realized that once again I made the same mistake as with the bunting. Not enough color contrast with the background. 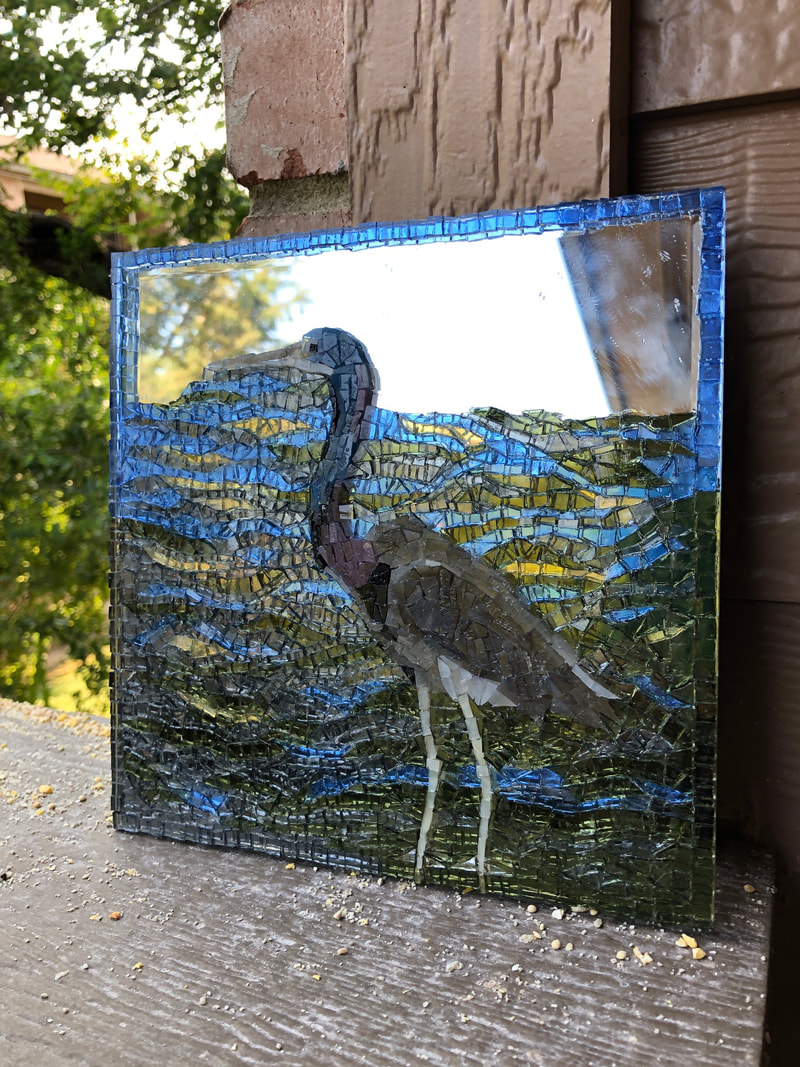 The distinction between the heron and the water shows best when I use outdoor lighting. But I have no place outside to hang it. And sadly, once grouted, it seemed to disappear completely. Even after I cleaned each tesserae and polished it up so that it was sparkling, it still didn't bring out the heron. 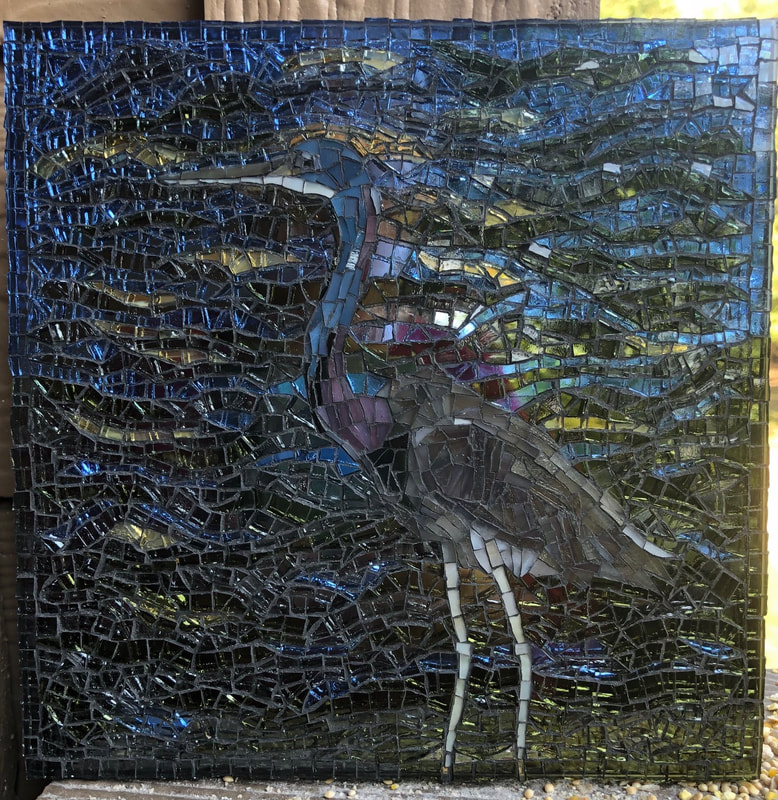 I decided to take a risk and regrout just the heron. I was thinking that the reason why the heron stood out in the photo was because the light was on it. Thus, what would happen if I regrouted it with white? 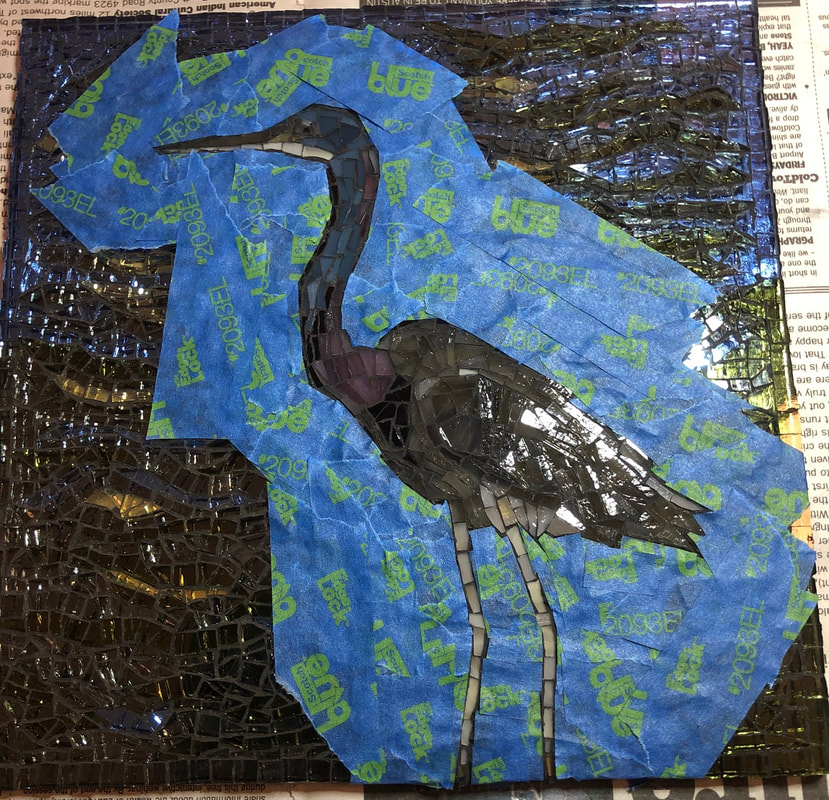 I took some time to outline the heron with masking tape to protect the rest of the mosaic. It was worth the effort because it made regrouting so much easier. 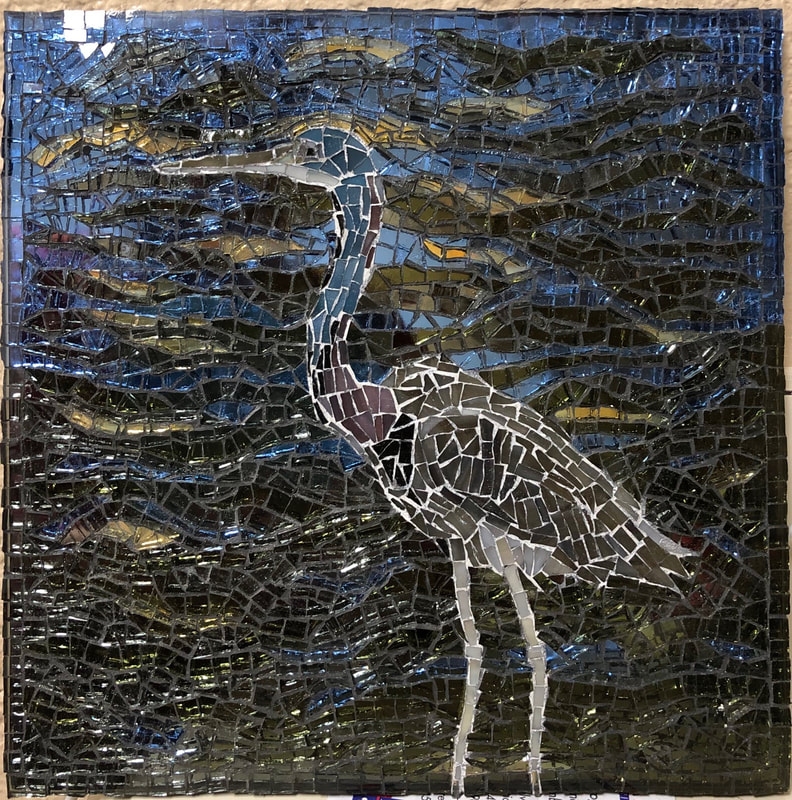 And while the heron does stand out better now, it doesn't look as handsome. But I'm stopping. I learned more, and that's the most important thing. Plus, I'm thinking about taking a different approach next time. The heron looked really beautiful halfway finished, when the mirror was half visible. 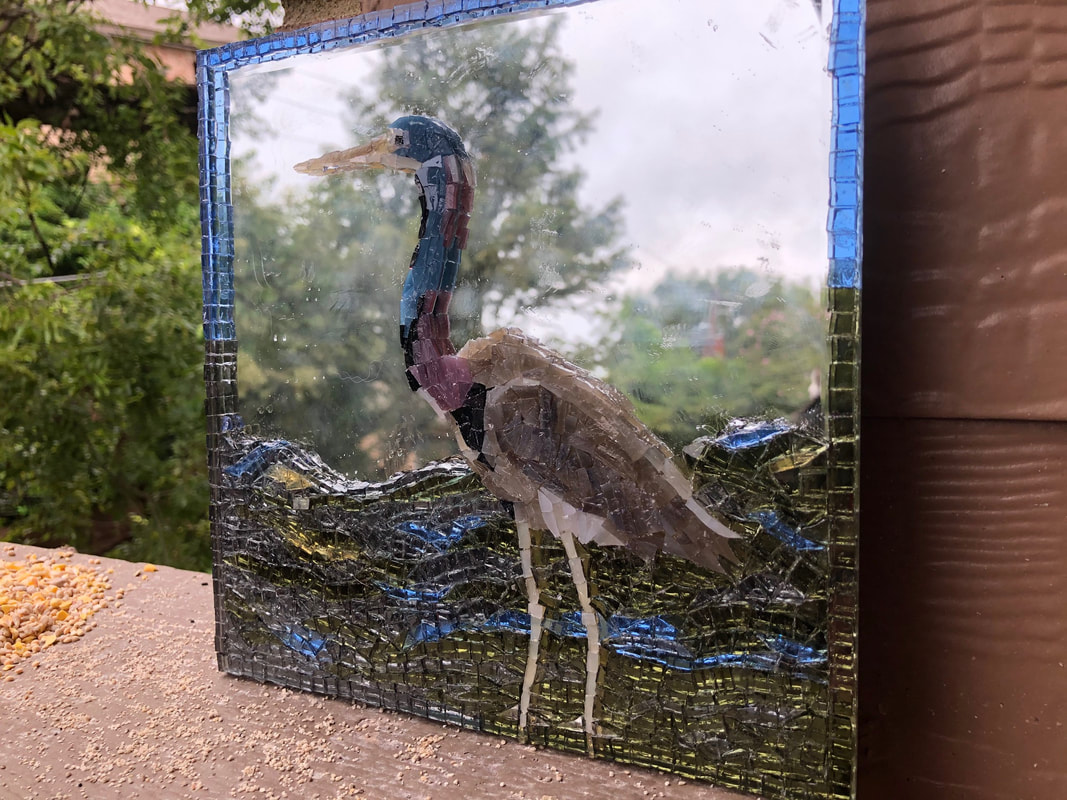 So I'm brainstorming on doing something more like this halfway point. Oh, and for a laugh, here's what happens when you drop a tessera into your glue: 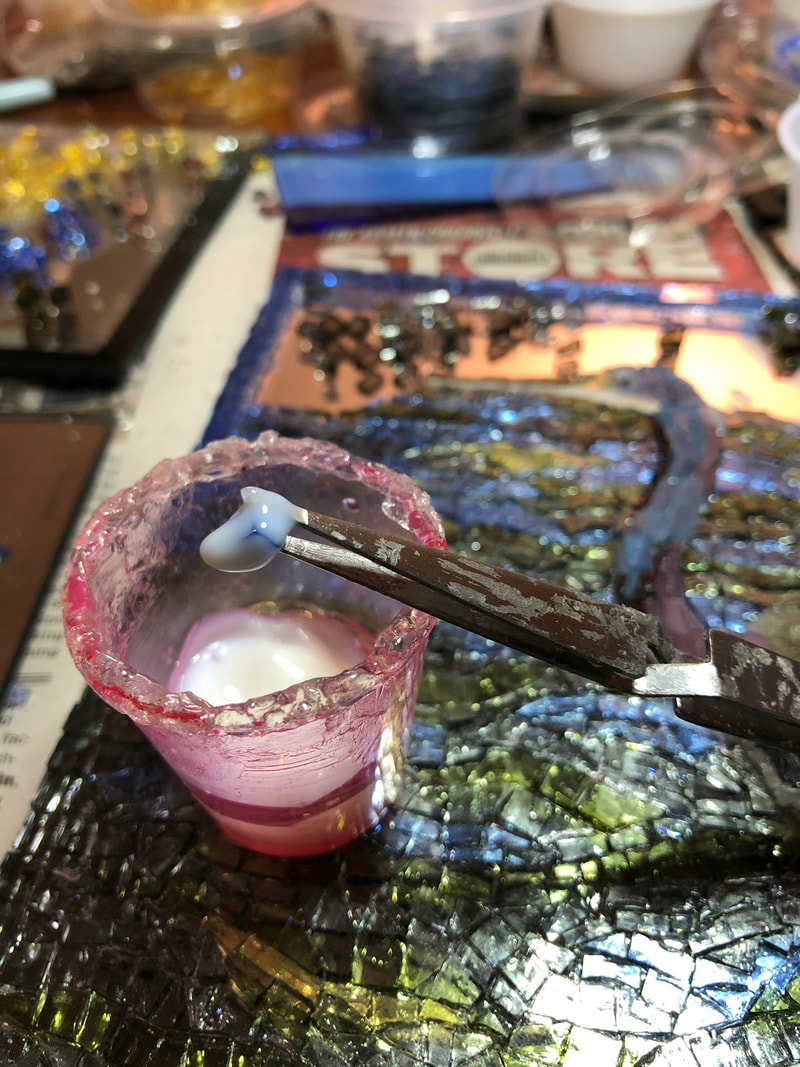 Oops.
I've been asked several times about where I get my tesserae or tiles. I purchase roughly 1 foot squares of stained glass and cut the tesserae myself. I do this for several reasons. First, I like stained glass. I like glass period. One day I want to learn how to blow glass but that costs money for classes. I would absolutely love to create Roman replica blown glass pieces, but that's for another time, if ever. Second, I know that some of the mosaics in Herculaneum were made with glass. If they could do it, why not me? Third, I want to make small mosaics with small tesserae. I suppose I could have done small with other mediums, even Smalti glass, but I wanted to make whatever size tesserae I needed. Fourth, I have this idea, which admittedly is just an idea, that I can make the stained glass go further than the same dollar amount of other materials. I could be wrong. What do I know. Most of the glass which I have purchased has run between $10-15 per square feet, so to have a variety of colors is not cheap. I'm still thinking a square foot of Smalti glass would cost significantly more. I purchased most of my glass and tools at the beginning of the summer with retirement gift cards. I now have most every color I think I may need and I keep the glass stored vertically between newspaper, which makes it easier to flip through the colors when I'm looking for something. 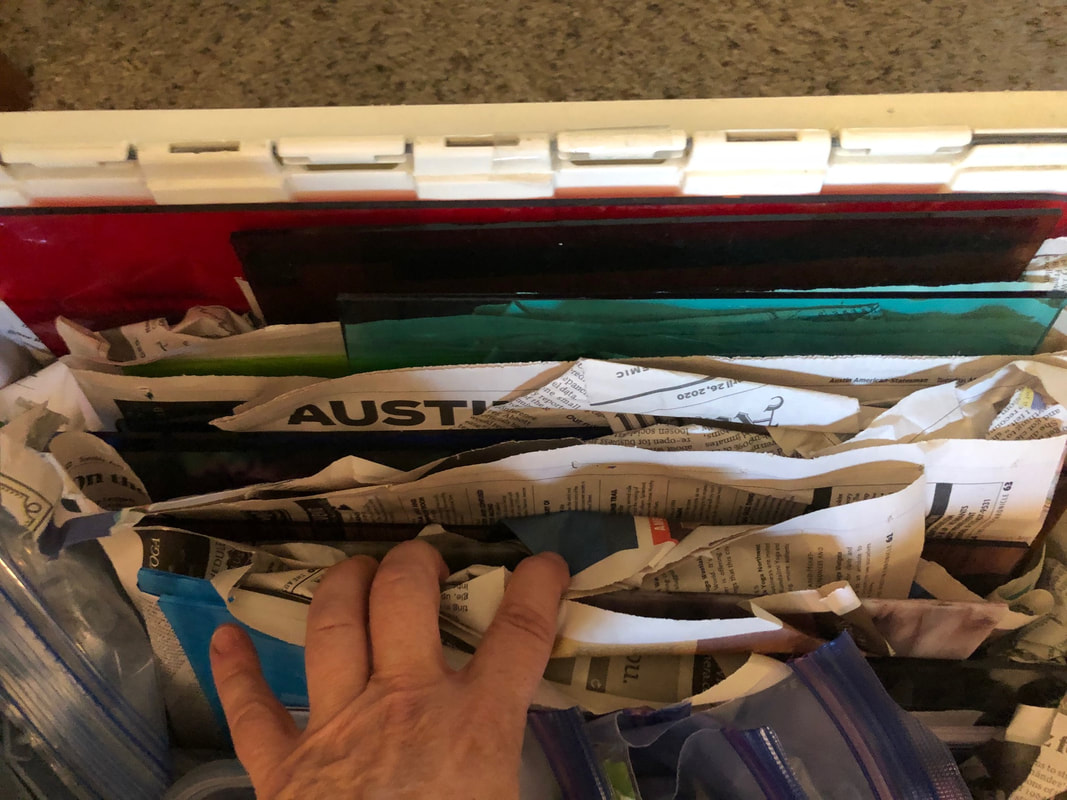 My white storage box filled with all the colors of glass which I have purchased this summer. The tools I use include
So, again, this second video is much like the first except I explain what I am doing and you can see all the tools. In this third video, you can see how I cut the glass into the smaller pieces. For the record, I am NOT squeezing the tool with my left hand. I am merely preventing the glass from shooting across the room. All of the hard work of squeezing the nippers is being done with my right hand, which is getting really strong! As the video explained, I like to start with strips that are a centimeter wide, and then I snip them into roughly centimeter squares. I can easily make my tiny square tesserae from these, or cut the glass into little rectangles or triangles or whatever shape I need in between.  Cut glass displayed on mirrors plus the larger blue glass I was beginning to cut down to smaller sizes. If you were thinking that this is tedious, it can be. Usually I do it while listening to something. I may have the TV on to binge watch/listen to some old favorite series. Cutting tesserae is also good for listening to audio books. I find it soothing, admittedly, and in the end I have these little piles of gems. (And I am not snacking on food because my hands are busy.) 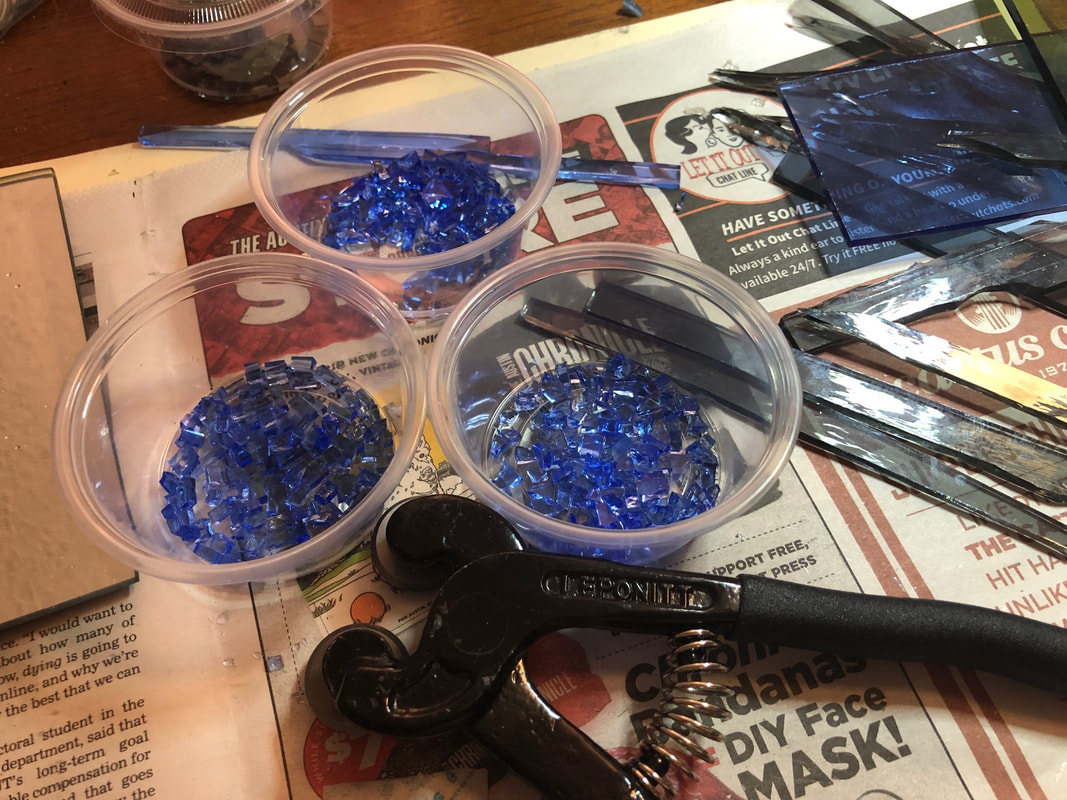 Blue tesserae sorted by shape. I've learned to keep them sorted by shape: little skinny rectangles, sharp triangles of all shapes, and four sided polygon shapes that help with curves. Makes it easier to find the shape that I need next, whatever shape that may be. I had to cut up some more glass yesterday because I had run out of some of the shapes I needed. Doing the water background for the heron has been an interesting learning process. From this angle you can't really see the wave patterns in the green (more on right) and grey (more on left), though you can with the blue and yellow. I'm now shifting up to the area which will have more blue than green & grey. The patterns hopefully will stand out more when this is grouted. I think the show better in sunlight anyway. 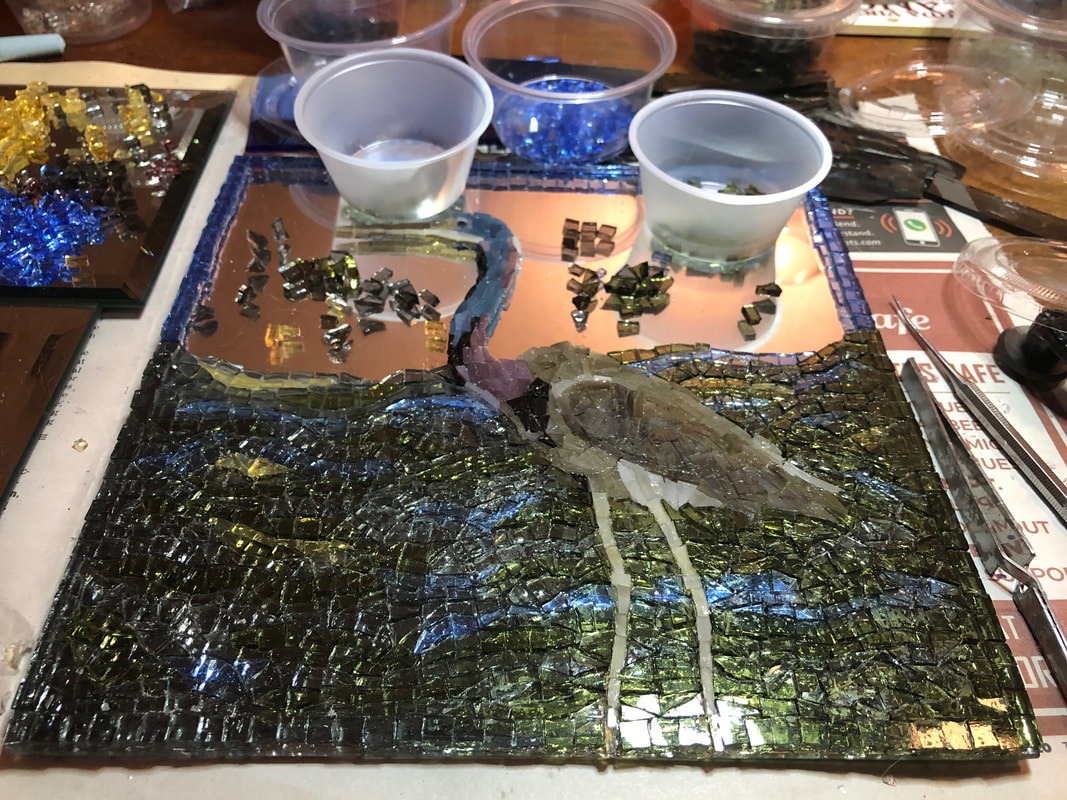 Heron mosaic in progress. I spent close to three hours cutting glass yesterday afternoon. I'm hoping that will be enough to get through at least half of what's left on this mosaic.
And remember, I am new to making mosaics. I haven't taken any classes because of Covid. I've only met with my local mosaics guild twice this year. I have read a book or two on making mosaics and stared at a lot of Roman mosaics over the years. I am no authority; this is only my journey into the art of making a mosaic. And one last thing: be careful using your feet to pick up little glass tesserae which you've dropped on the floor. Although I have often gotten away with this because the tesserae are so small, I did prick my big toe last night and ended up with blood on my carpet. Eek! I mean, you do of course need to be cautious because this is glass and keep your work area cleaned up. |
AuthorRamblings of a retired Latin teacher, creative creature, and general person rediscovering life after teaching. Archives
August 2023
Categories |
 RSS Feed
